Command Palette
Search for a command to run...
Online Tutorial | Easily Create Monet's Garden and Hayao Miyazaki's Comic Styles, and Use ComfyUI InstantID to Create a Variety of Photos

Once InstantID, which has the ability to generate high-quality images, was released, it immediately set off a wave of enthusiasm in the open source field. It not only won the praise of technical giants such as Turing Award winner Yann LeCun, but also gained 9.9k collections on GitHub and was recognized by engineers.
From a technical perspective, InstantID avoids the need to train the UNet part of the text-based graph model. By only training a lightweight pluggable module, it achieves no need for test-time tuning during inference while maintaining the flexibility of text control and ensuring high fidelity of facial features.InstantID also supports text prompt editing.It can be customized with just simple text instructions.
Last week, HyperAI released "InstantID personalized photo generation Demo" tutorial (click to view detailed tutorial), this tutorial is based on WebUI, simple and easy to use, the functions are clear at a glance, the threshold for use is low, and novices can quickly get started.Style transfer in 5 seconds.
However, it is difficult for InstantID based on WebUI to make local and precise adjustments to the generated images. This is also due to the characteristics of WebUI, and it lacks flexibility.
so,HyperAI launched the "ComfyUI InstantID Workflow Online Tutorial" this week.ComfyUI's modular design enables high customization. At the same time, ComfyUI's node-based interface and workflow framework are also very suitable for projects that require frequent modification and expansion.
ComfyUI InstantID can give users greater freedom and richer creative space.Just adjust the connection nodes to achieve personalized customization,Allow users to have more refined control over the entire process.

In addition, the tutorial directly helps users download the model group in advance and deploy it in the cloud. It also builds a workflow for users so that they can clone and use it with one click.This undoubtedly greatly reduces the usage threshold of ComfyUI, and you no longer have to worry about node connection errors!
Public tutorial address:
Demo Run
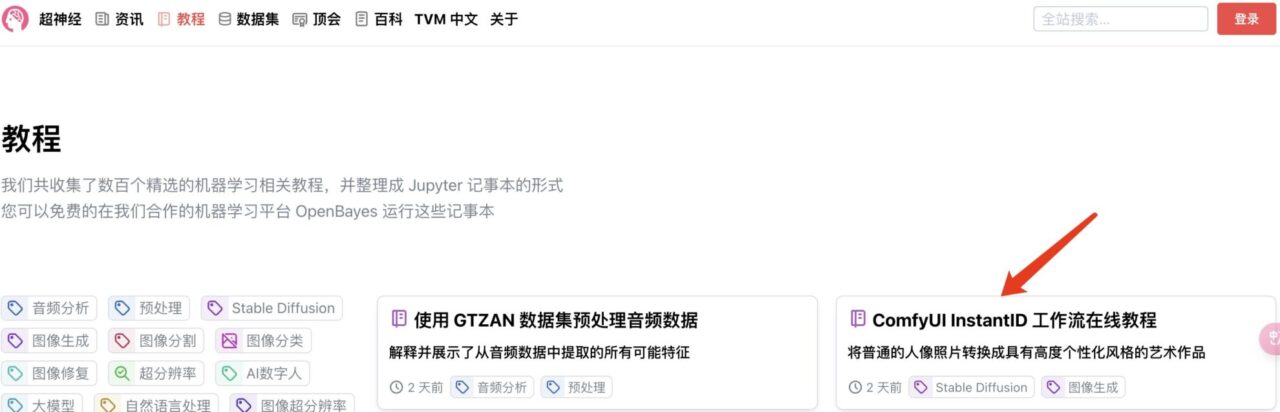
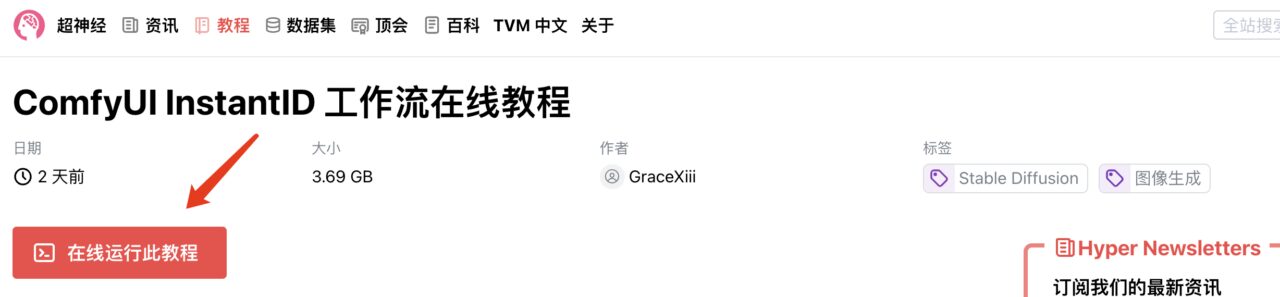
1. Log in to hyper.ai, and on the Tutorials page, select ComfyUI InstantID Workflow Online Tutorial. Click Run this tutorial online.
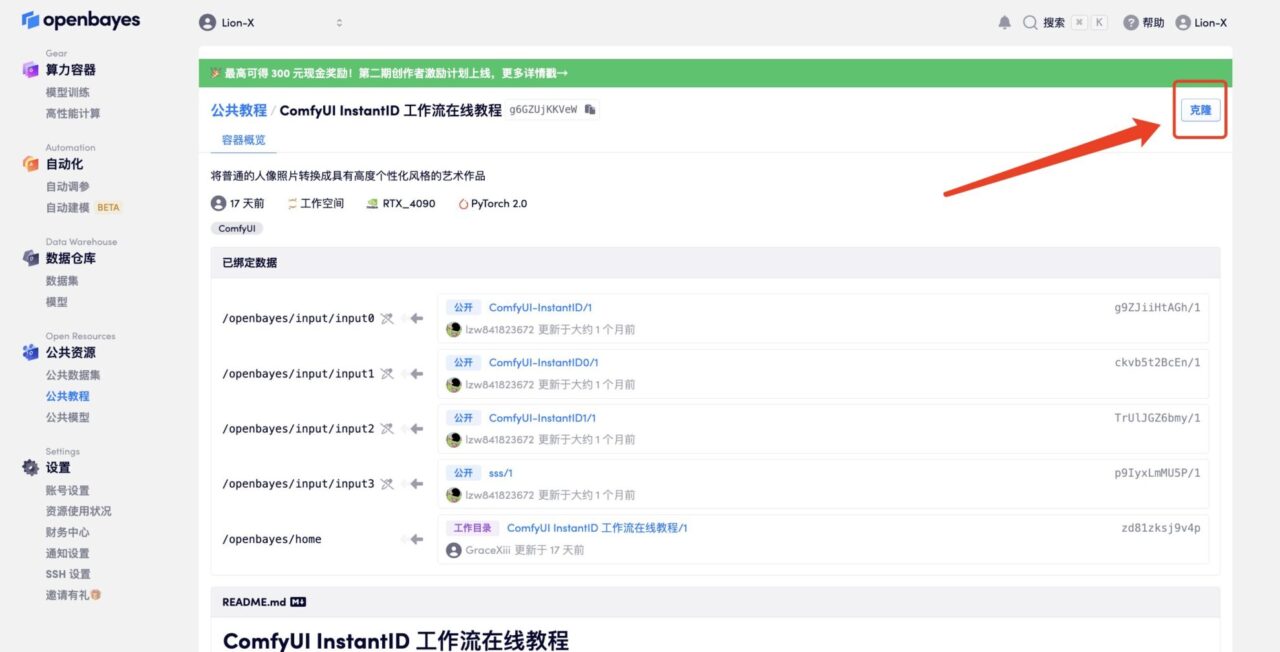
2. After the page jumps, click "Clone" in the upper right corner to clone the tutorial into your own container.
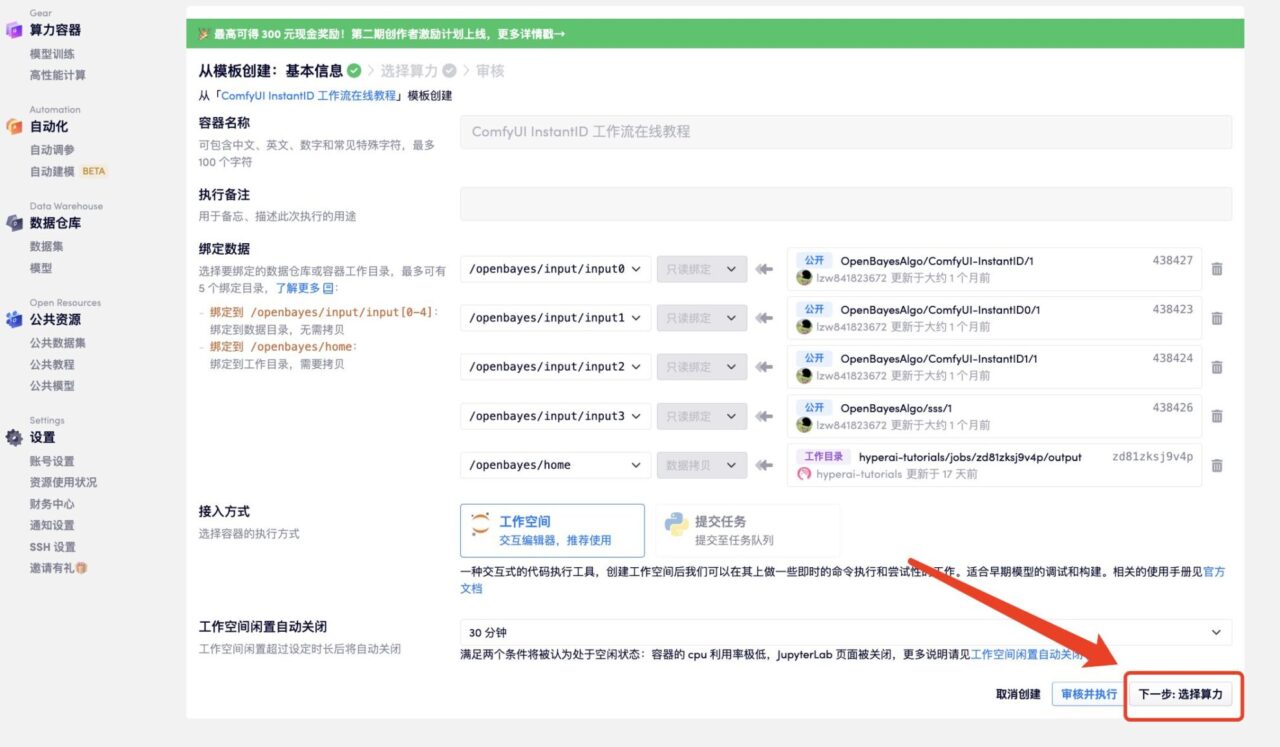
3. Click "Next: Select Hashrate" in the lower right corner.
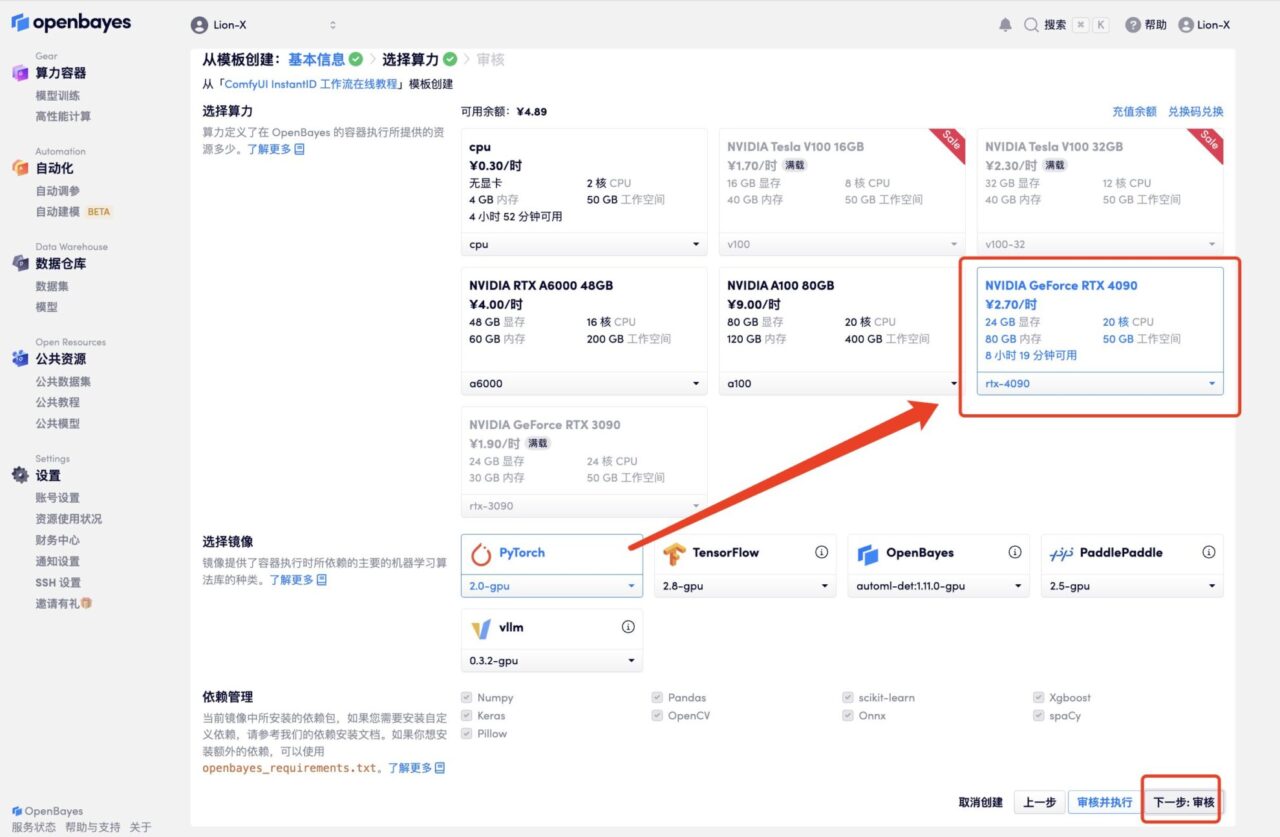
4. After the jump, select "NVIDIA GeForce RTX 4090" and click "Next: Review".New users can register using the invitation link below to get 4 hours of RTX 4090 + 5 hours of CPU free time!
HyperAI exclusive invitation link (copy and open in browser):https://openbayes.com/console/signup?r=6bJ0ljLFsFh_Vvej
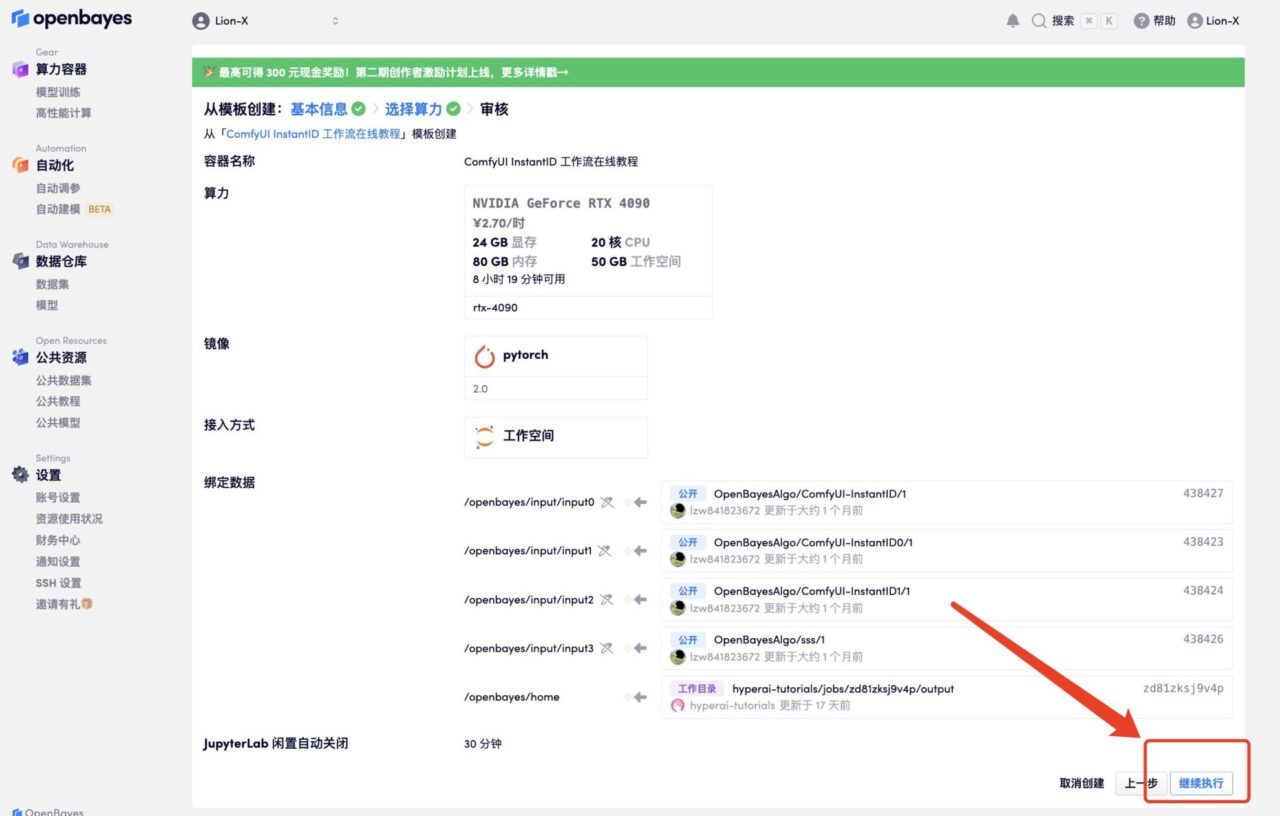
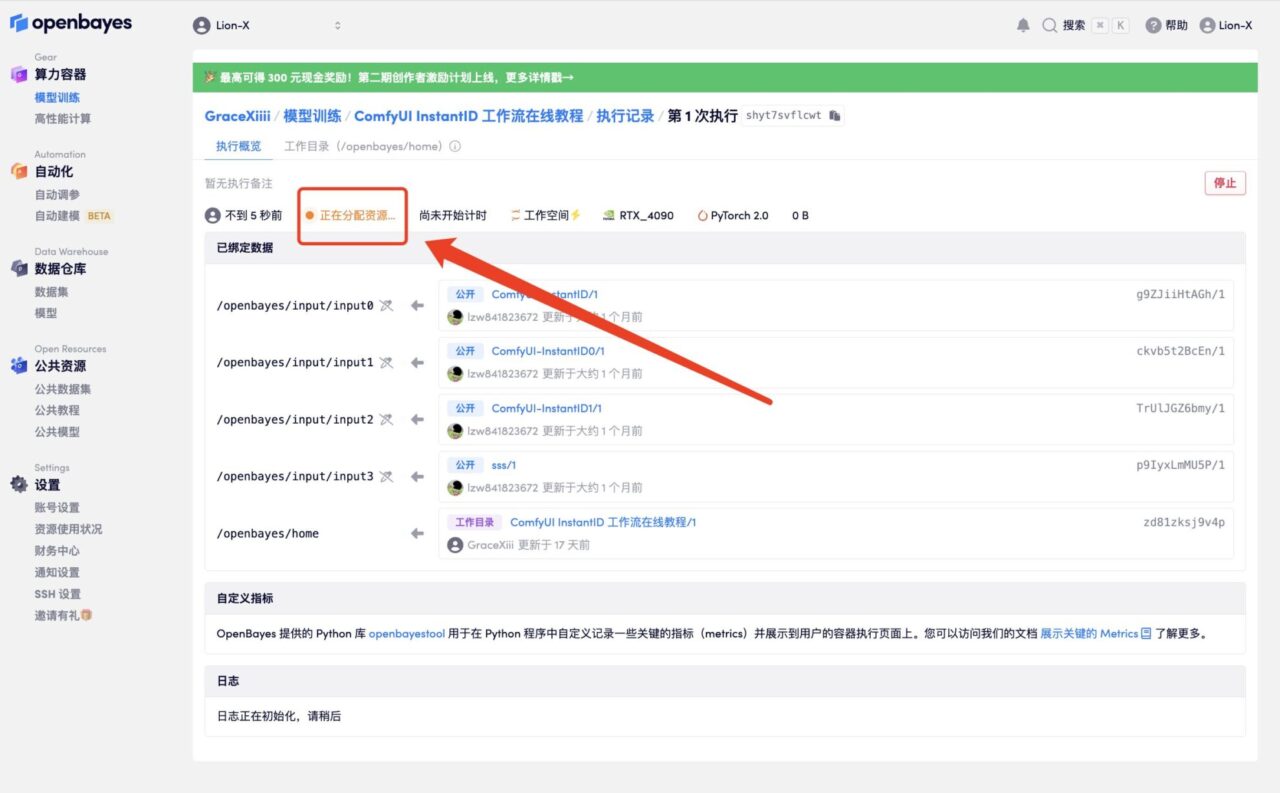
5. Click "Continue" and wait for resources to be allocated. The first cloning process takes about 3-5 minutes. When the status changes to "Running", click "Open Workspace".
If the issue persists for more than 10 minutes and remains in the "Allocating resources" state, try stopping and restarting the container. If restarting still does not resolve the issue, please contact the platform customer service on the official website.

6. After opening the workspace, create a new terminal session on the startup page, then enter the following code in the command line to start the environment. Just copy and paste it.
python ComfyUI/main.py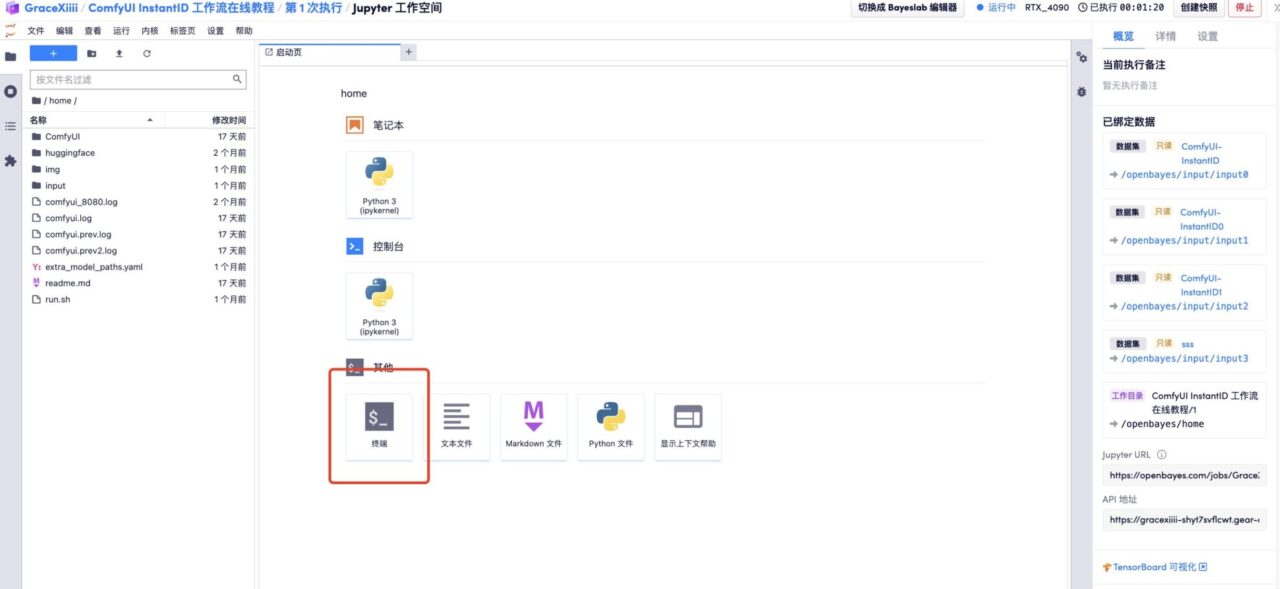

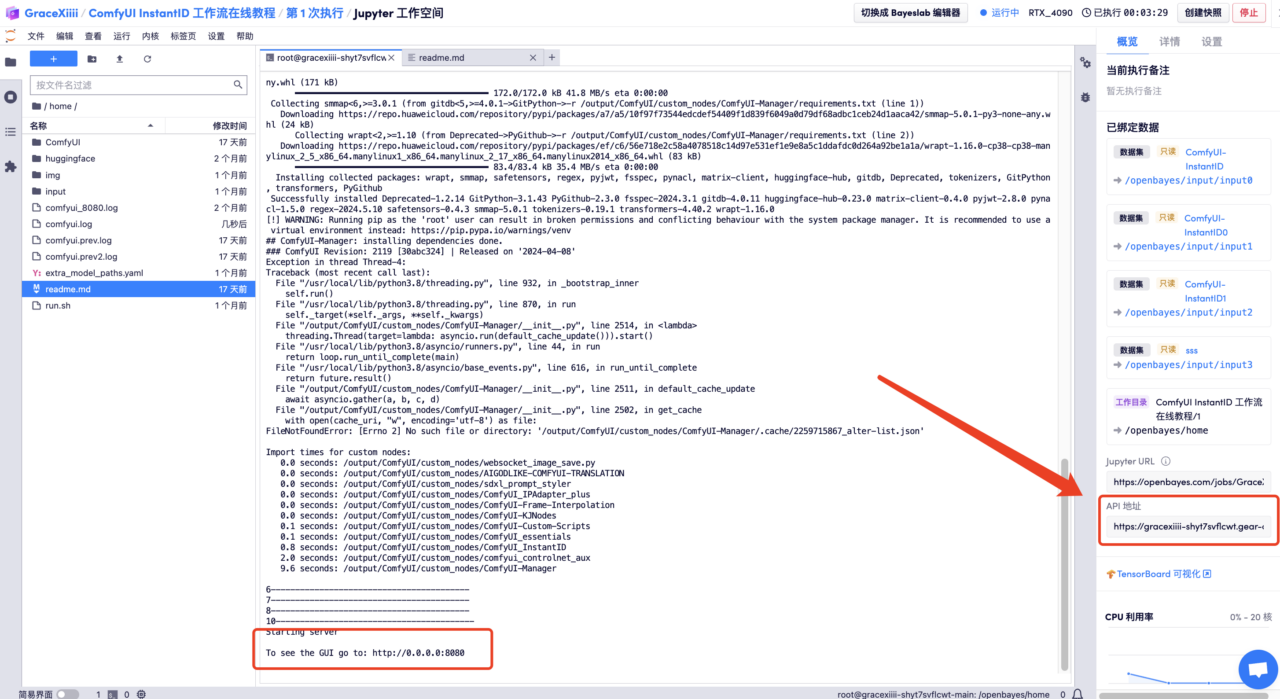
7. When "https://0.0.0.0:8080" appears in the command line, copy the API address on the right to the browser address bar to open the ComfyUI interface.Please note that users must complete real-name authentication before using the API address access function.
Effect display
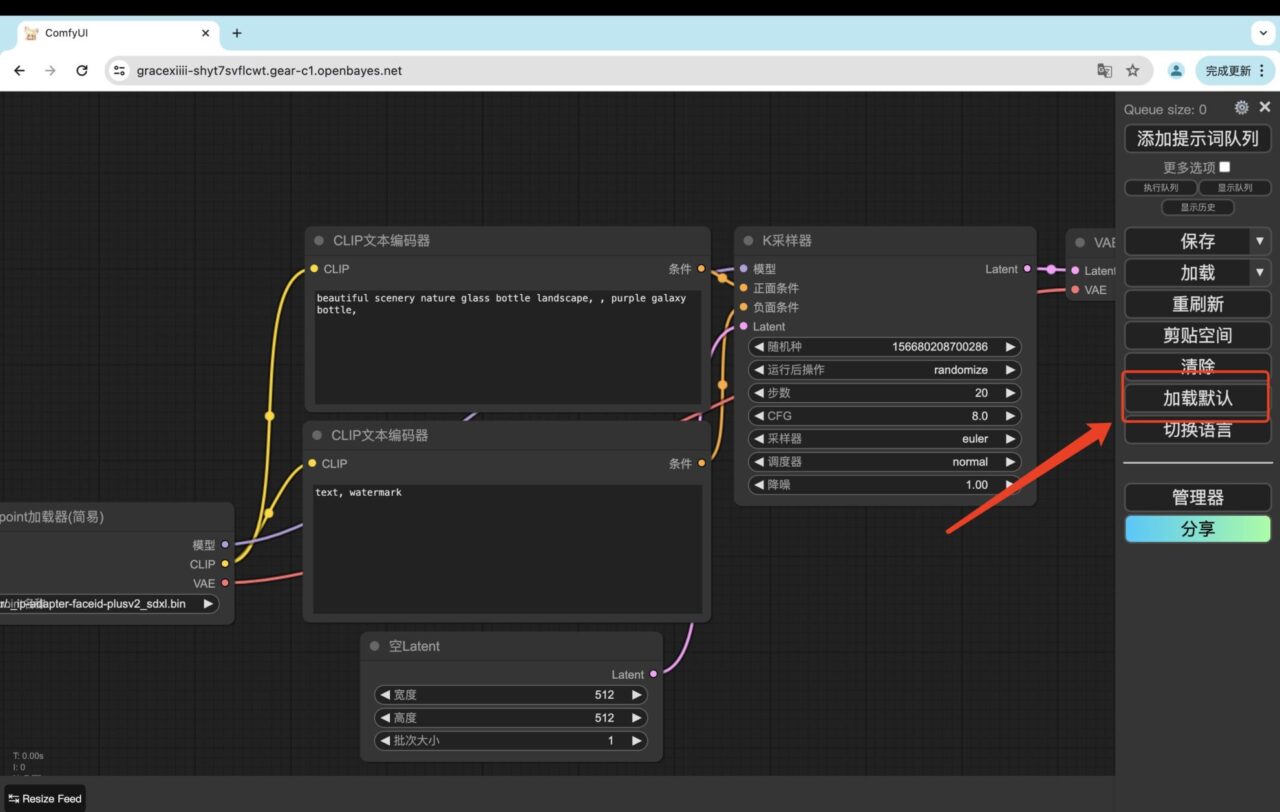
1. After opening the API address, refresh the page and switch the language to Chinese.
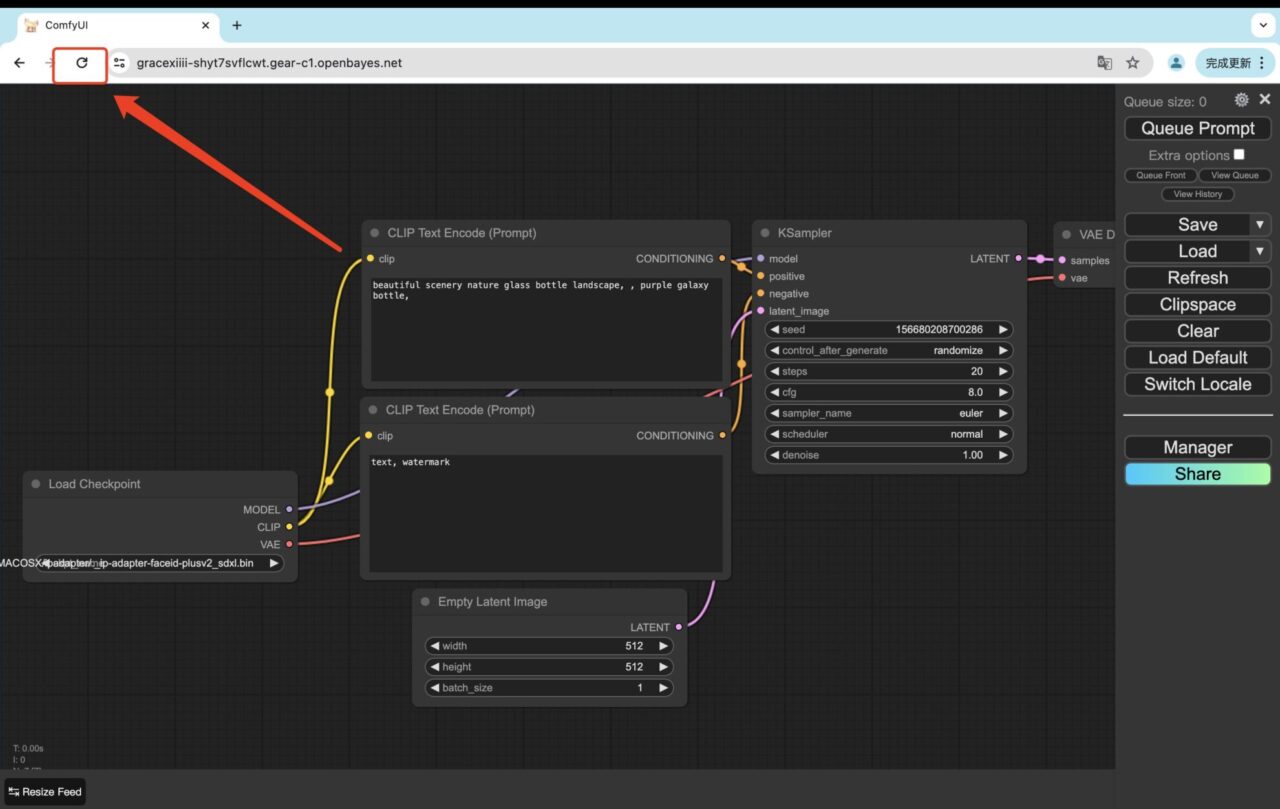
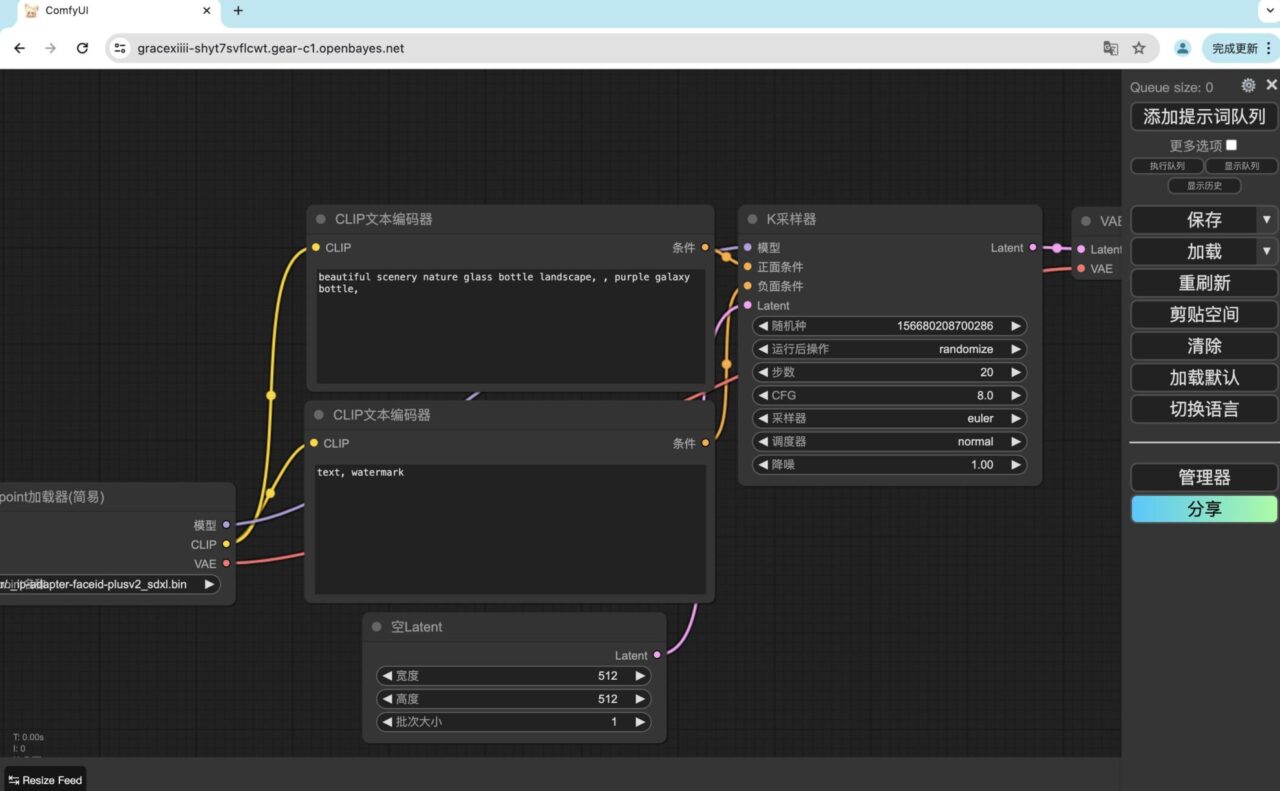
2. Click "Load Default" to load the ComfyUI InstantID workflow.
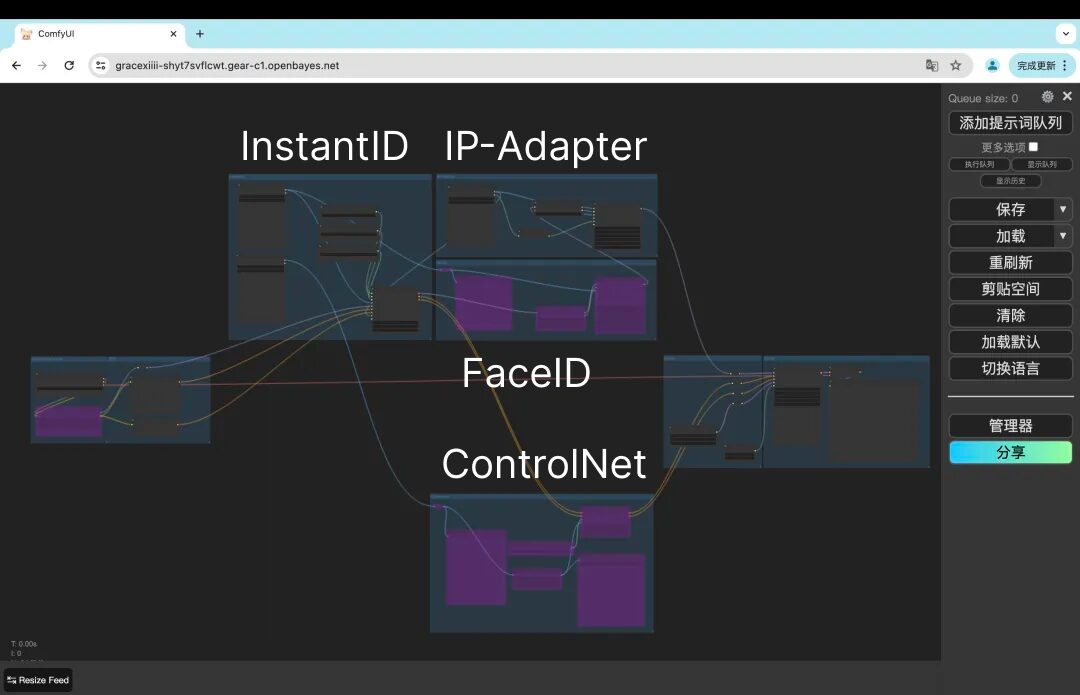
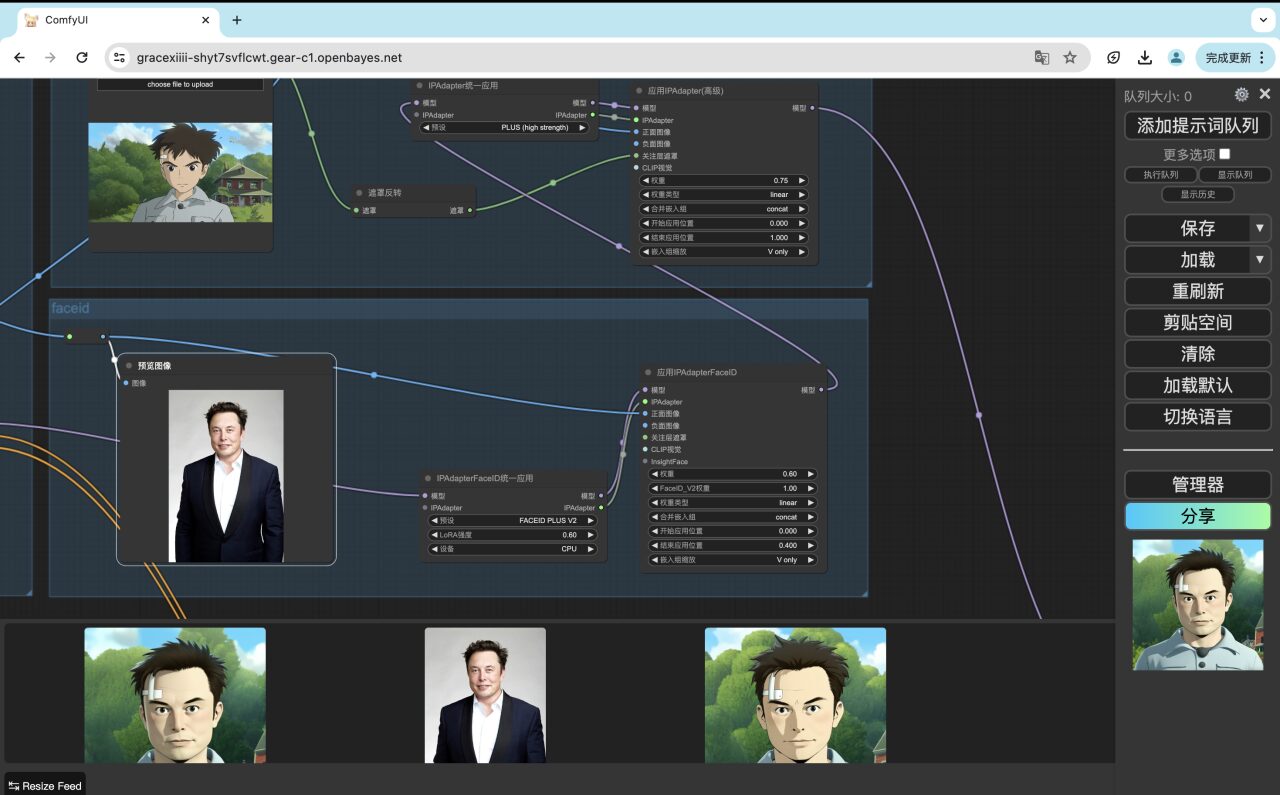
- IP-Adapter: IP-Adapter is a component in InstantID technology that recognizes facial features. It is used in conjunction with ControlNet to achieve precise control of facial features and style transfer.
- FaceID: Improves facial consistency and makes facial features more accurate.
- ControlNet: Helps determine the location of the person's face in the final generated image.
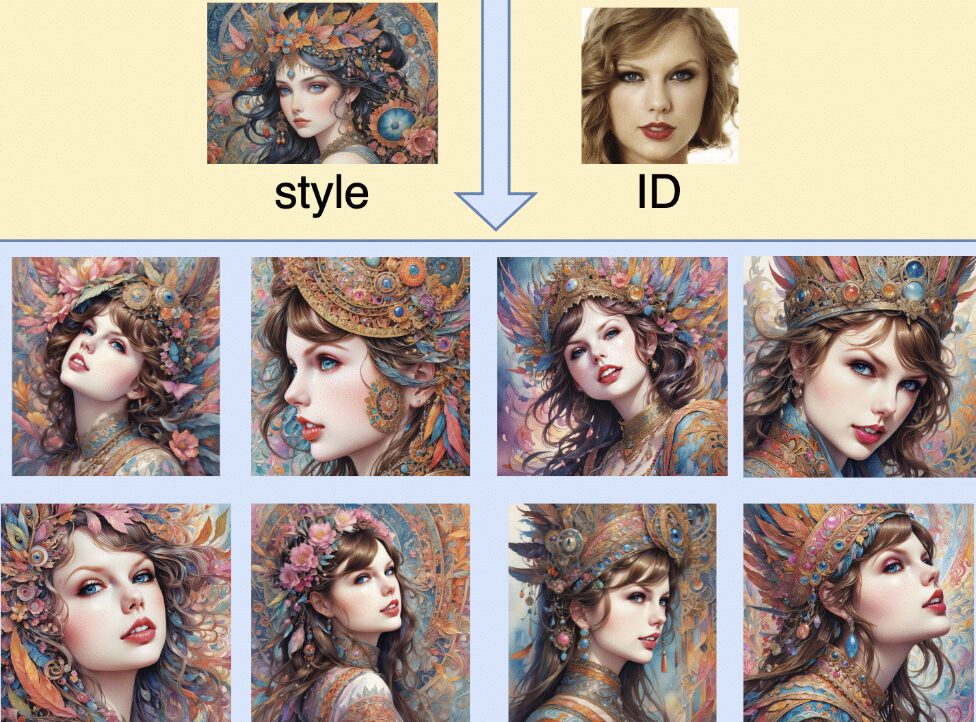
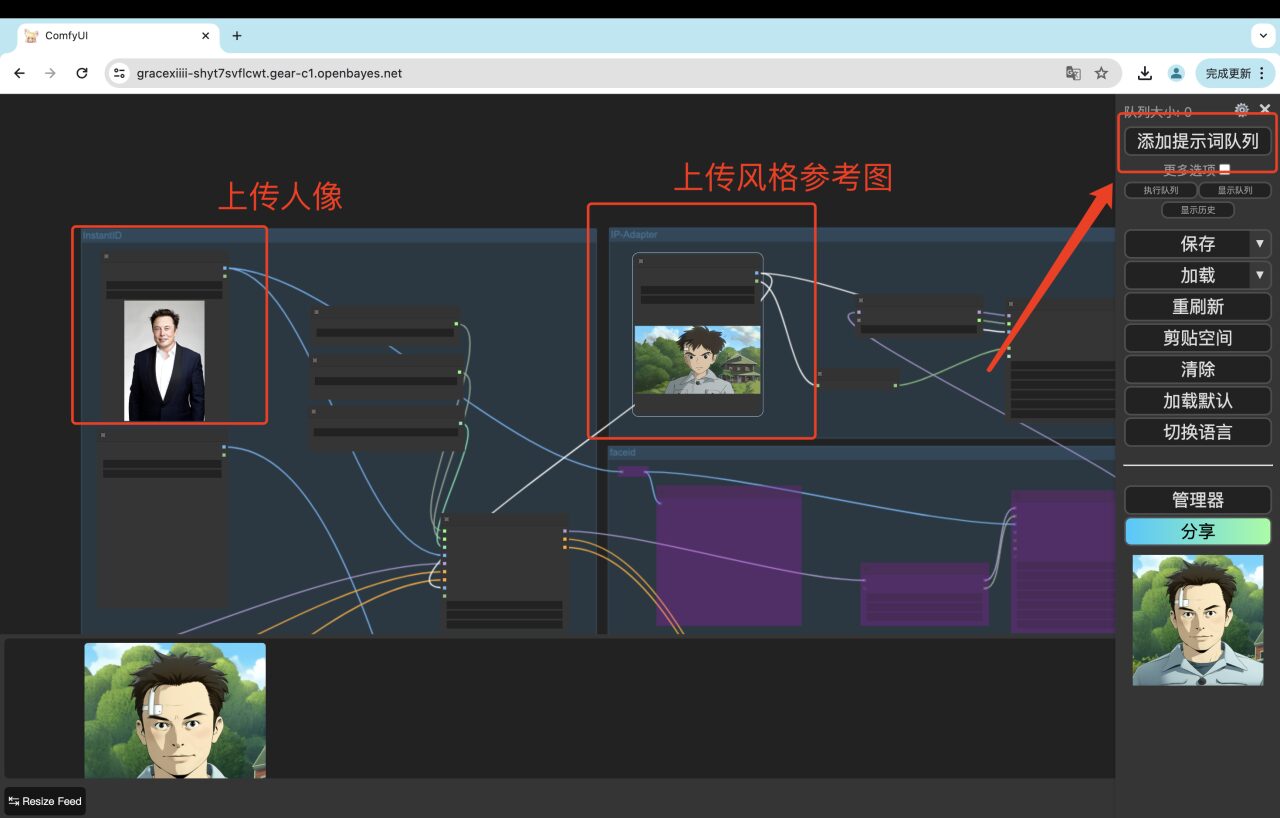
3. After uploading a portrait image in the InstantID node and a style reference image in the IP-Adapter node, click "Add prompt word queue" to generate the image after style transfer.

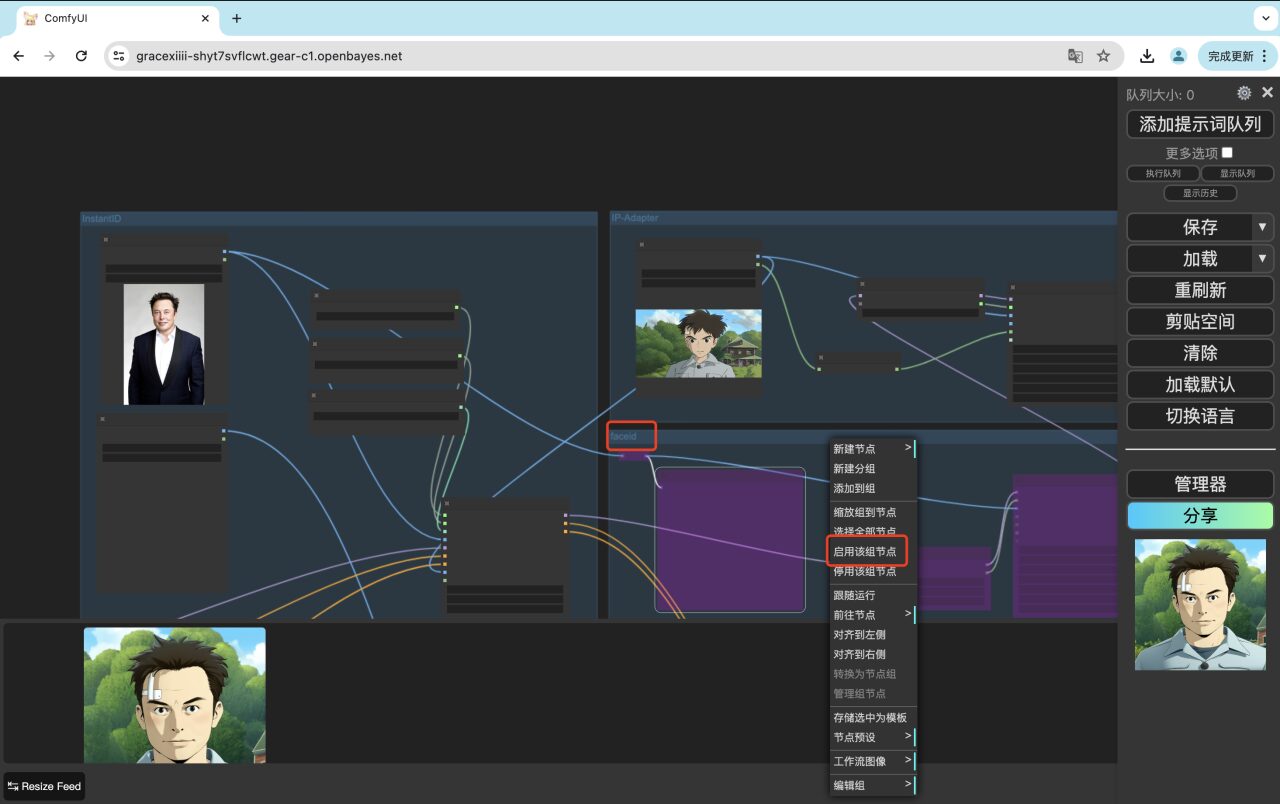
4. If you want to achieve better results, you can right-click the "FaceID" node, select "Start this group of nodes", and then click "Add prompt word queue" to generate a more realistic style transfer image.

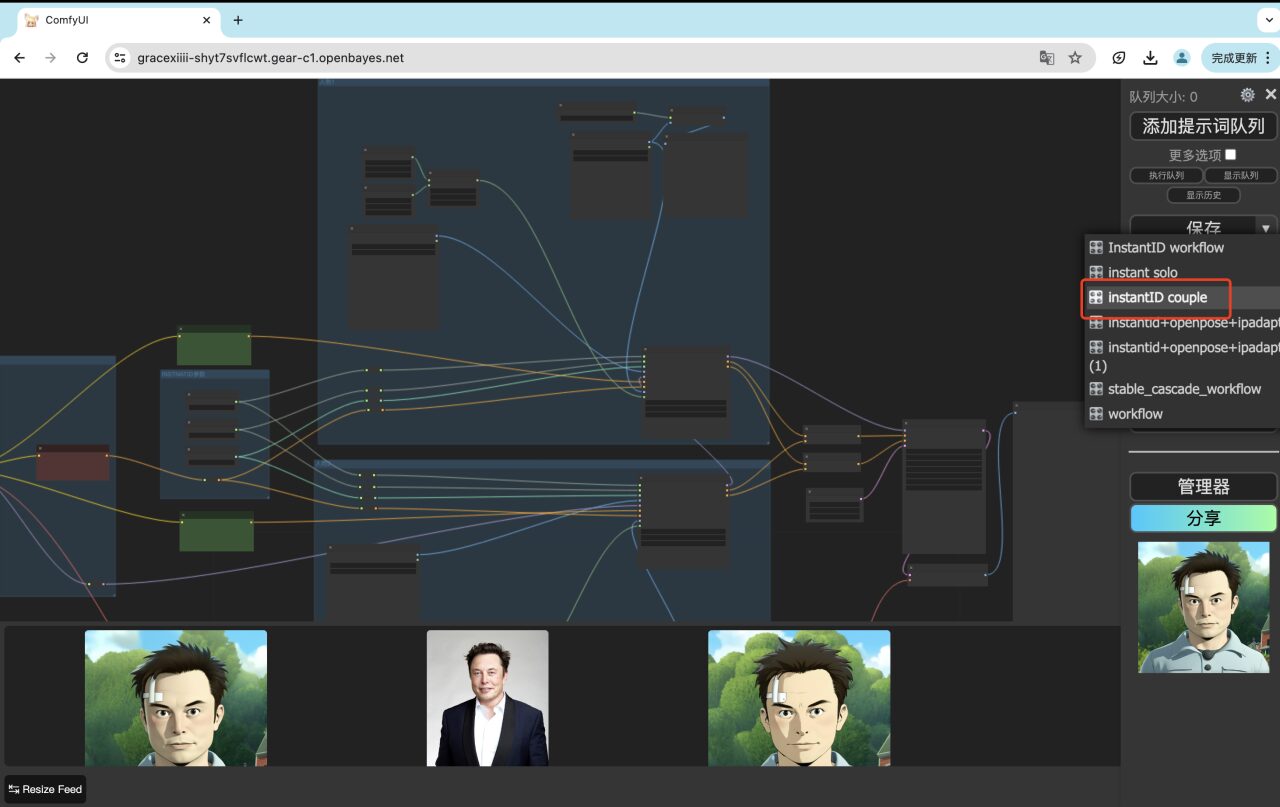
5. If you want to achieve the effect of merging two characters into the same style image, click the small arrow to the right of "Load" and switch the workflow to "InstantID couple".
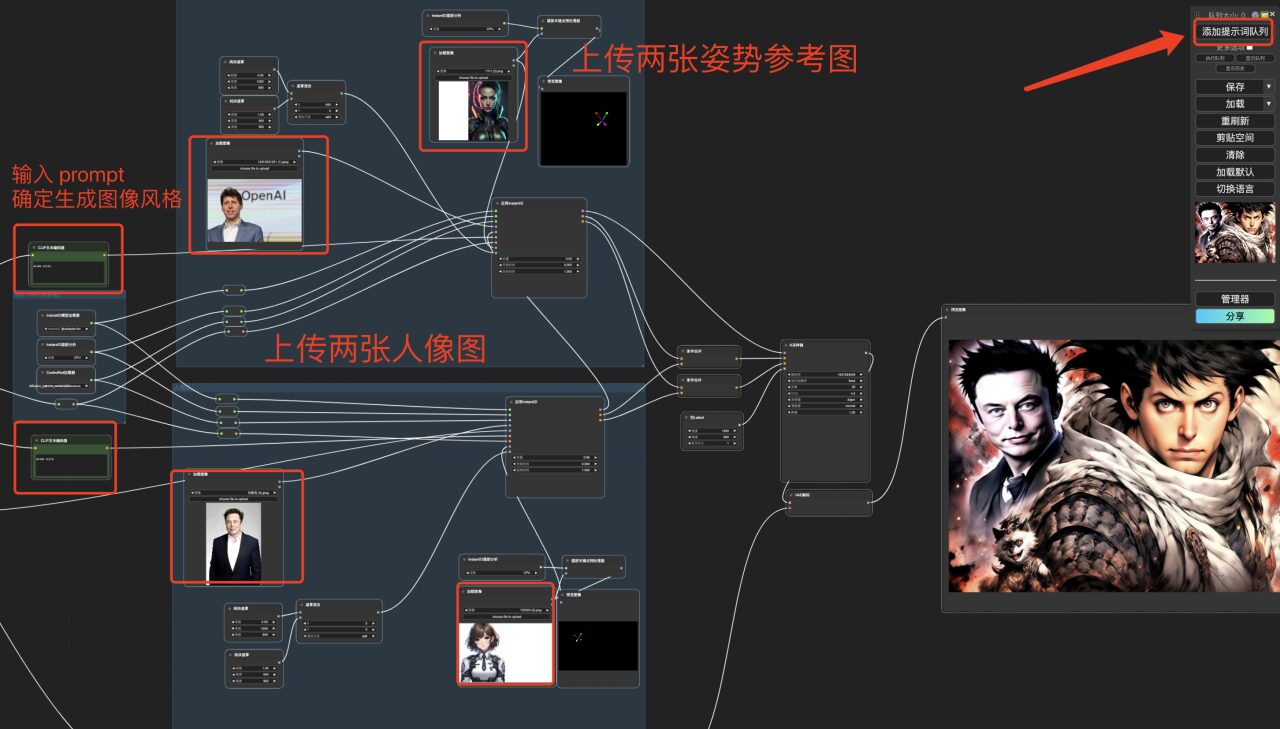
After switching the workflow, upload two different person images that you want to merge, as well as their respective pose reference images, and enter the prompt to confirm the generated image style. Please note that the positions of the faces in the pose reference images need to be distributed on the left and right sides.
At present, the HyperAI official website has launched hundreds of selected machine learning related tutorials, which are organized into the form of Jupyter Notebook.
Click the link to search for related tutorials and datasets:https://hyper.ai/tutorials
The above is all the content of HyperAI Super Neural Network’s sharing this time. If you see a high-quality project, please leave a message in the background to recommend it to us! In addition, we have also established a "Stable Diffusion Tutorial Exchange Group", welcome friends to join the group to discuss various technical issues and share application results~
Scan the QR code below to add HyperaiXingXing on WeChat (WeChat ID: Hyperai01), and note "SD Tutorial Exchange Group" to join the group chat.