Command Palette
Search for a command to run...
Online Tutorial | In-depth Guide to Instruction Following/Inference/Coding: Mistral Medium 3.5 Brings Coding Agents to the Cloud

As AI Agent capabilities continue to evolve, large-scale models are gradually transforming from "conversational assistants" into truly intelligent systems capable of performing tasks. Recently, Mistral AI's Mistral Medium 3.5 further propels AI Coding Agents to a new level. Compared to traditional programming assistants that can only perform simple code completion, it can now run independently in the cloud, process tasks in parallel, and continuously complete complex software development processes, including code generation, debugging, dependency installation, test execution, and even pull request submission.
As Mistral's latest flagship model, the Mistral Medium 3.5 adopts a 128B dense architecture, has 256k context windows, and for the first time integrates instruction following, reasoning, and coding capabilities into a single model.
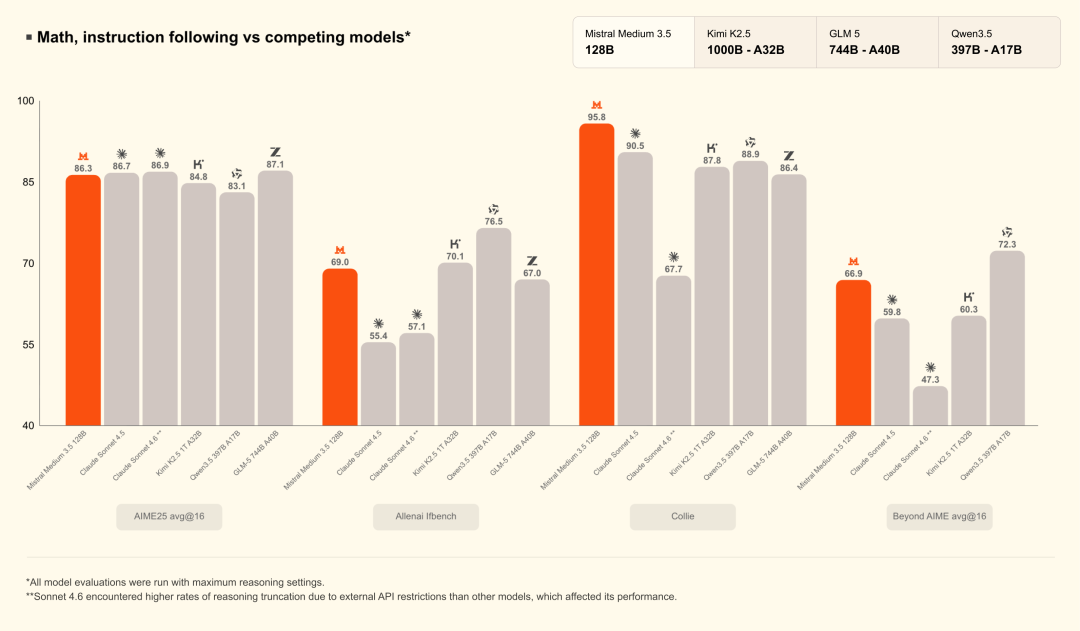
Unlike current large models that heavily rely on the MoE architecture, Mistral has chosen to further strengthen its Dense Model approach, enhancing its long-duration task processing capabilities while maintaining inference stability. Official data shows that Mistral Medium 3.5 achieved a score of 77.61 TP3T on the SWE-Bench Verified, surpassing models such as Devstral 2 and Qwen3.5 397B A17B, and also demonstrating strong performance in Agent capability tests such as τ³-Telecom.
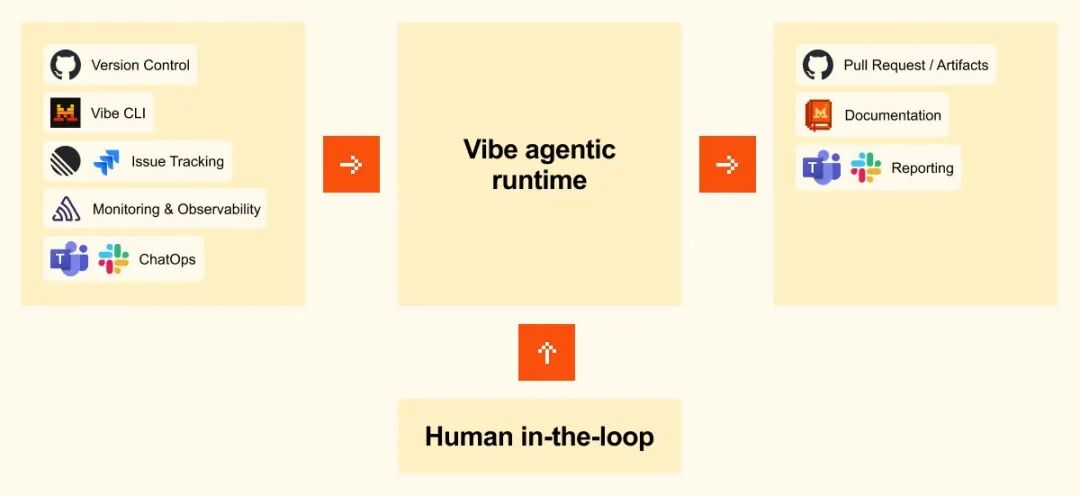
Beyond the model itself, the most noteworthy aspect of this update is Mistral's comprehensive restructuring of the AI Agent workflow. Through Vibe Remote Agents, developers can run asynchronous Coding Sessions directly in the cloud, eliminating the need for tasks to remain continuously online on a local computer. Users can initiate tasks via the CLI or launch cloud agents directly within Le Chat, allowing the model to continuously perform multi-step coding tasks, including module refactoring, test generation, CI troubleshooting, and bug fixing. Simultaneously, the newly added Work Mode supports cross-tool collaboration, enabling access to external systems such as email, calendars, documents, and collaboration platforms, gradually evolving into a true "execution-oriented AI assistant."
To some extent, Mistral Medium 3.5 represents more than just a model upgrade; it signals a significant shift in AI coding from "copilot" to "autonomous agent." In the past, AI primarily served as an auxiliary code generator; now, models are beginning to possess the ability to execute tasks for extended periods, invoke tools, manage processes, and deliver results. With continuous improvements in context length, inference stability, and agent framework, future software development processes may also undergo significant changes.
Currently, the tutorial section of HyperAI's official website (hyper.ai) has launched "One-click deployment of Mistral-Medium-3.5-128B" to complete the environment configuration and further reduce the threshold for using the model.
Run online:
More online tutorials:
Welcome to visit our official website for more information:
Demo Run
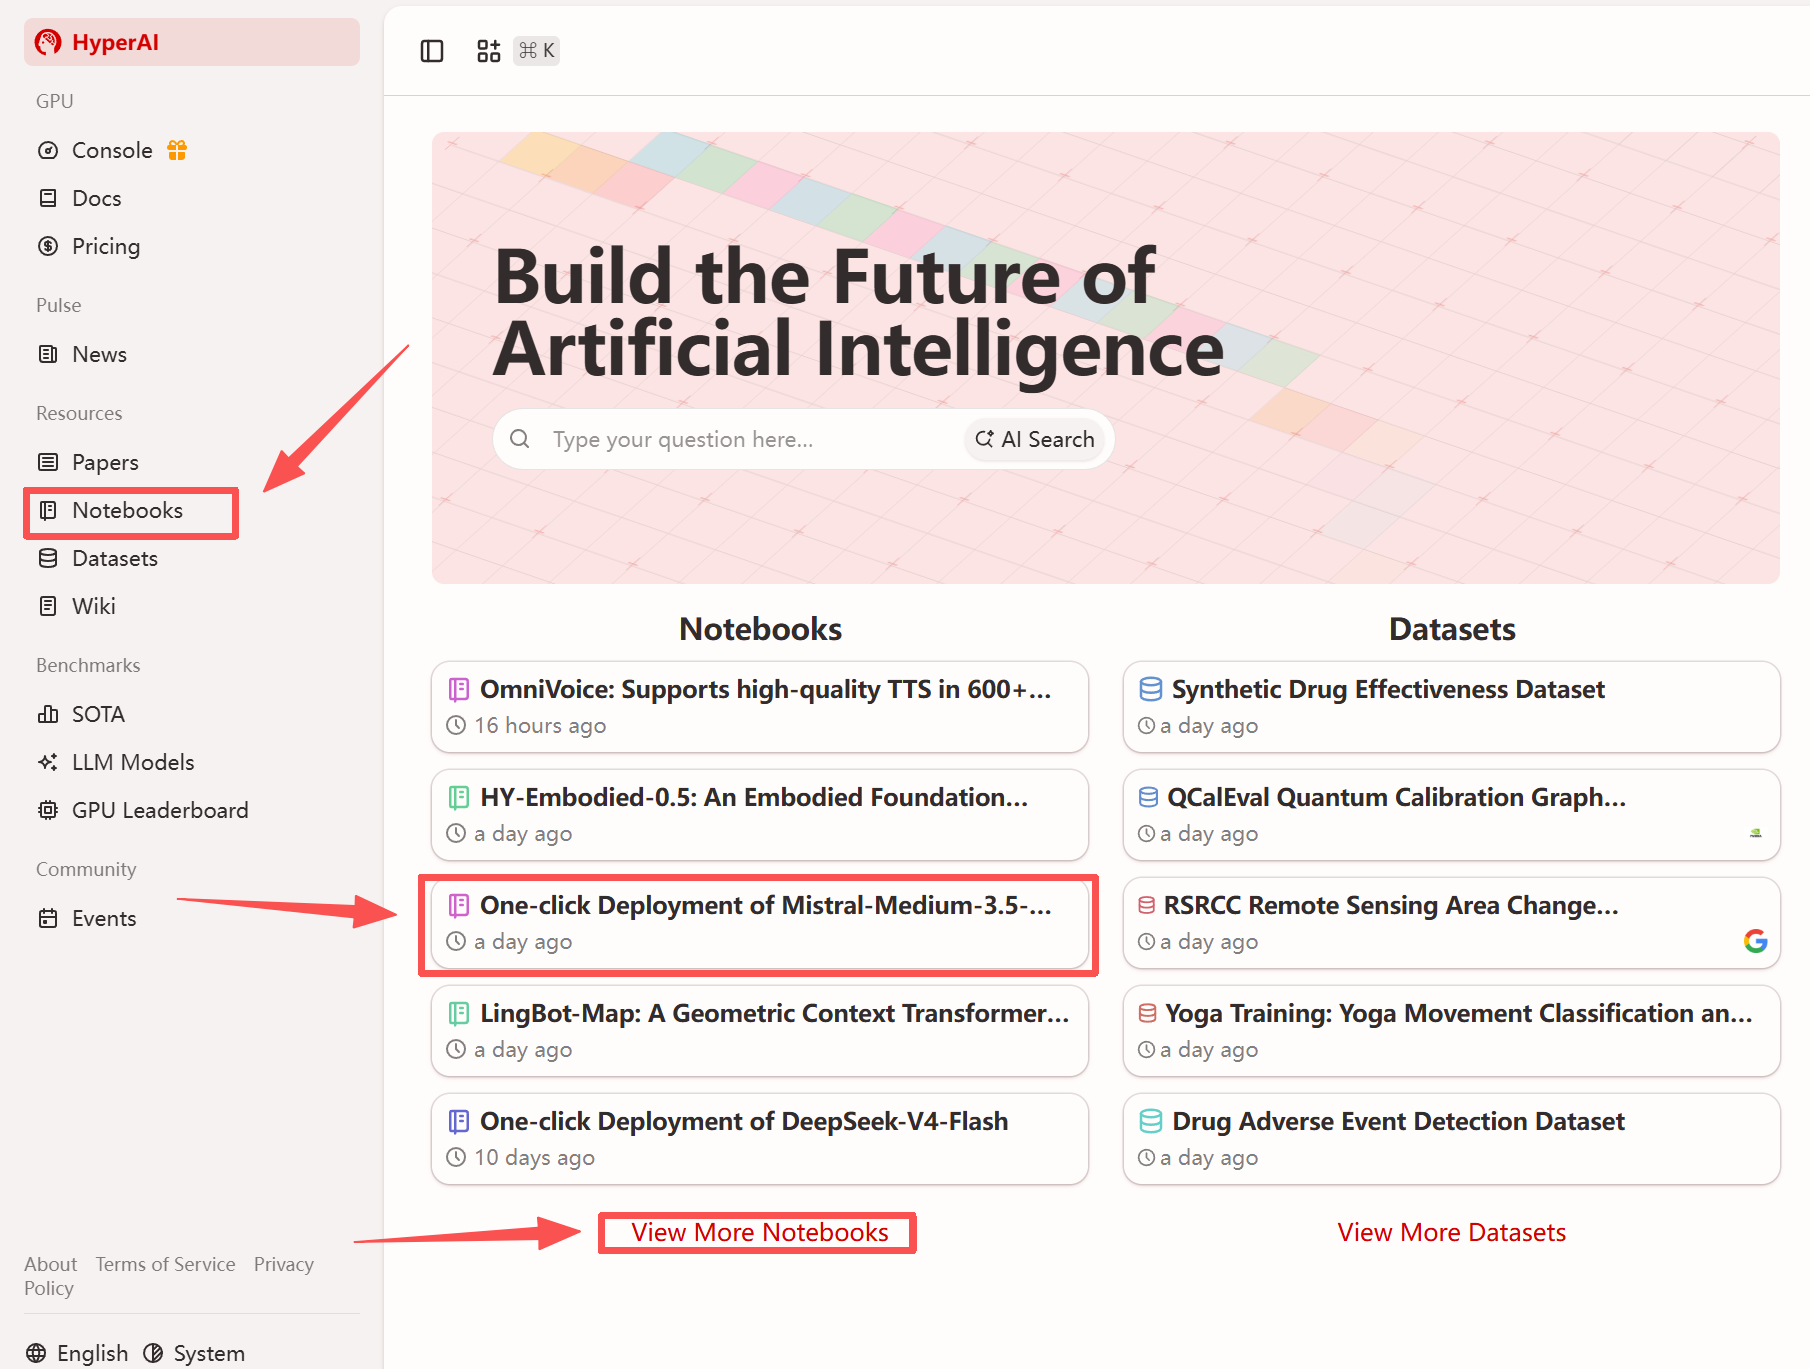
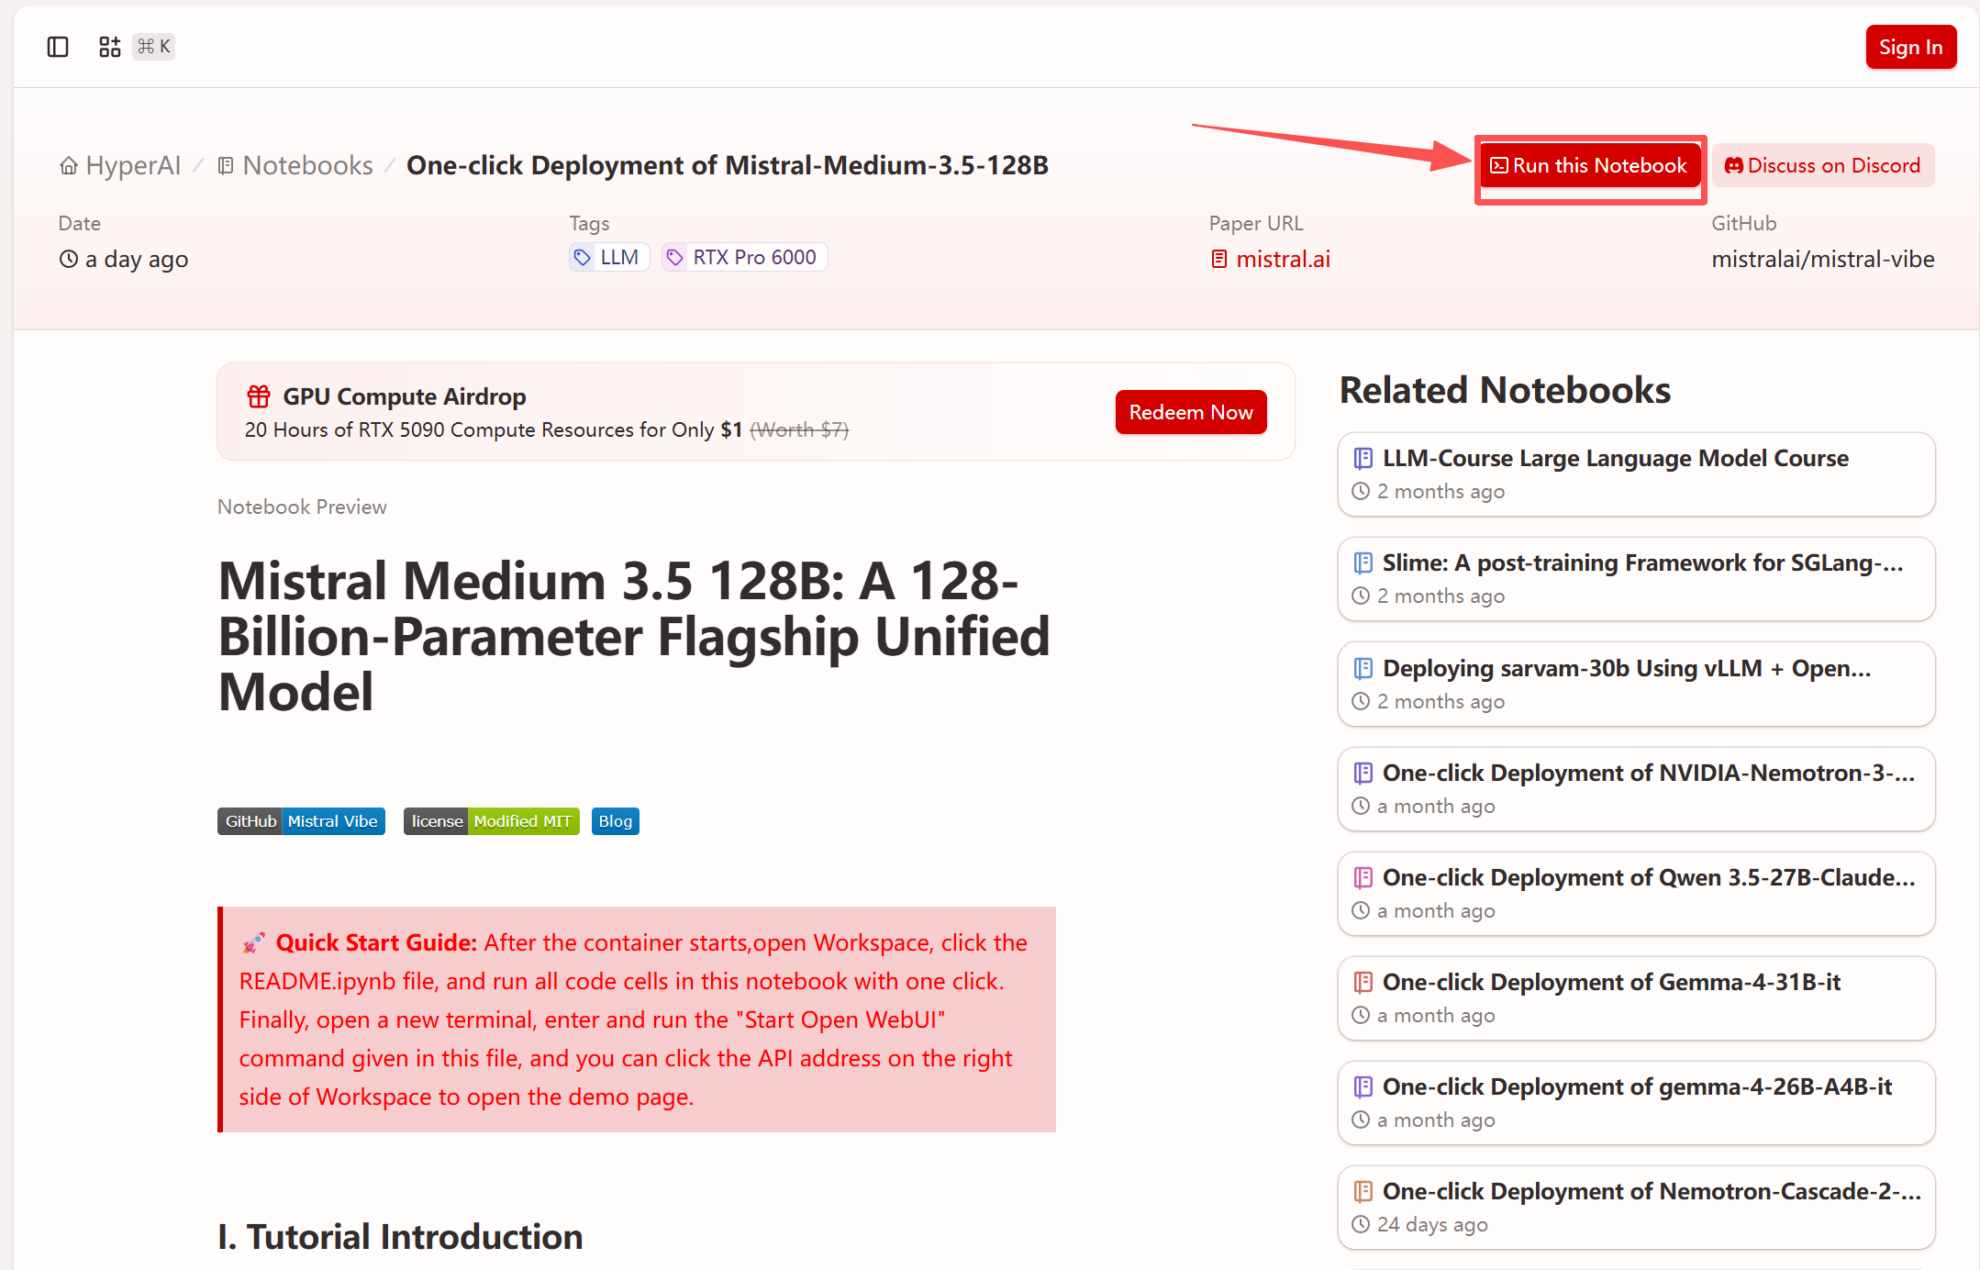
1. After entering the hyper.ai homepage, select the "Tutorials" page, or click "View More Tutorials", select "One-Click Deployment of Mistral-Medium-3.5-128B", and click "Run this tutorial".
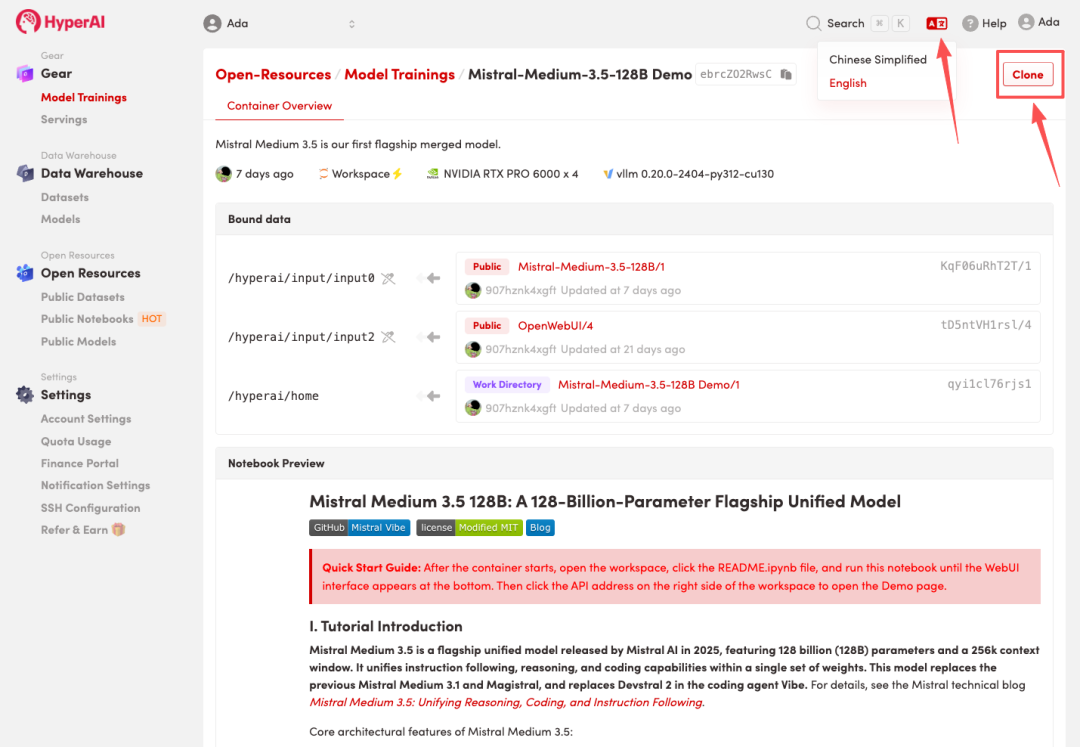
2. After the page redirects, click "Clone" in the upper right corner to clone the tutorial into your own container.
Note: You can switch languages in the upper right corner of the page. Currently, Chinese and English are available. This tutorial will show the steps in English.
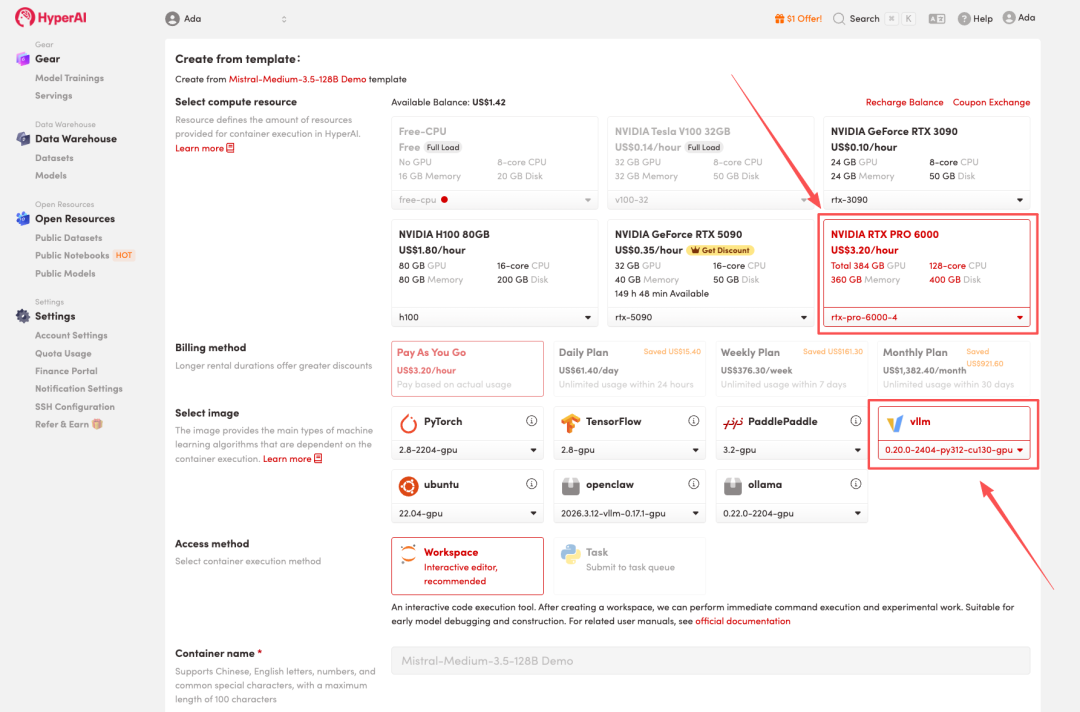
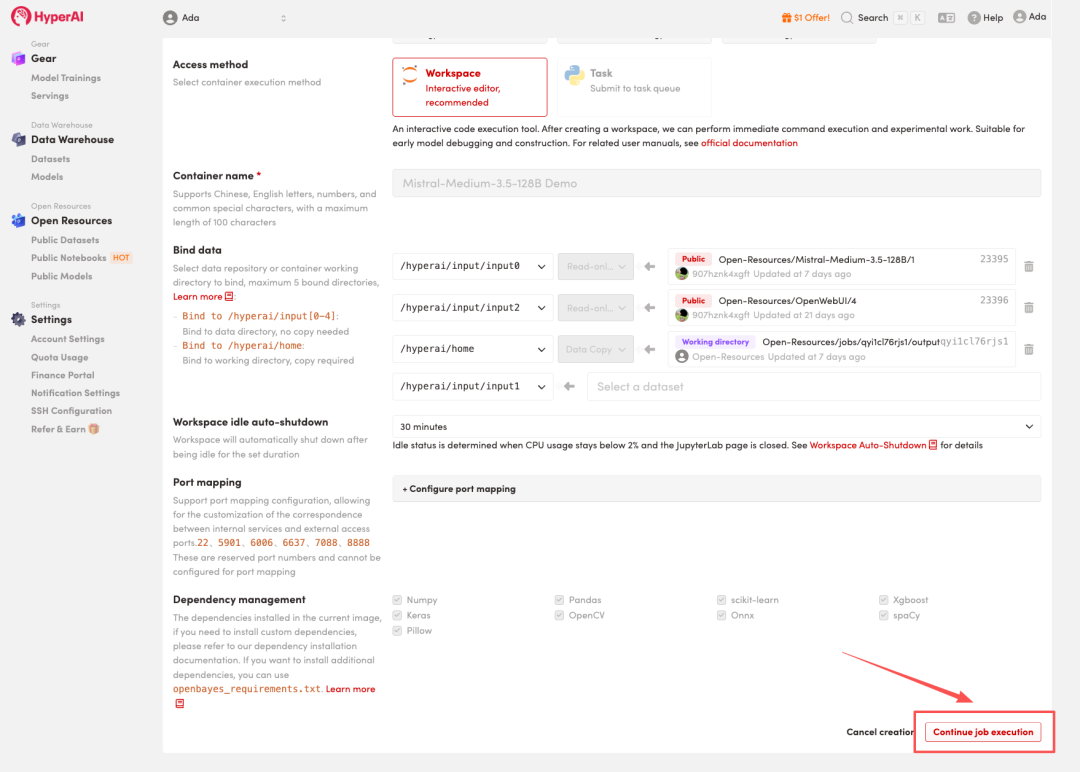
3. Select the "NVIDIA RTX PRO 6000 -4" and "vLLM" images, and click "Continue job execution".
HyperAI is offering a registration bonus for new users: for just $1, you can get 20 hours of RTX 5090 computing power (originally priced at $7), and the resources are valid indefinitely.
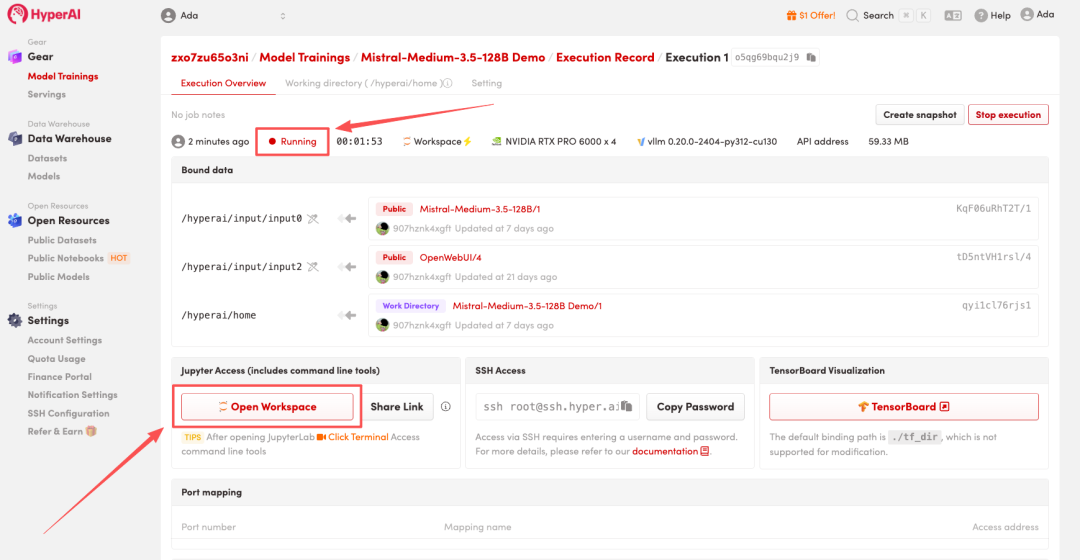
4. Wait for resources to be allocated. Once the status changes to "Running", click "Open Workspace" to enter the Jupyter Workspace.
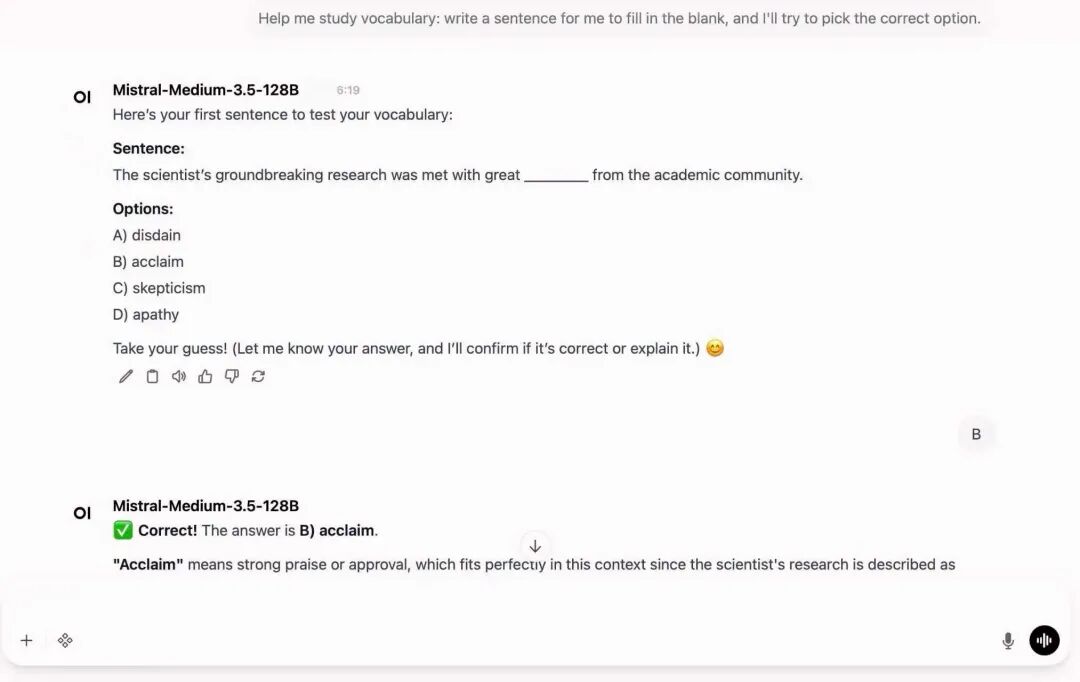
Effect display
1. After the page redirects, click on the README file on the left, and then click on Run at the top.

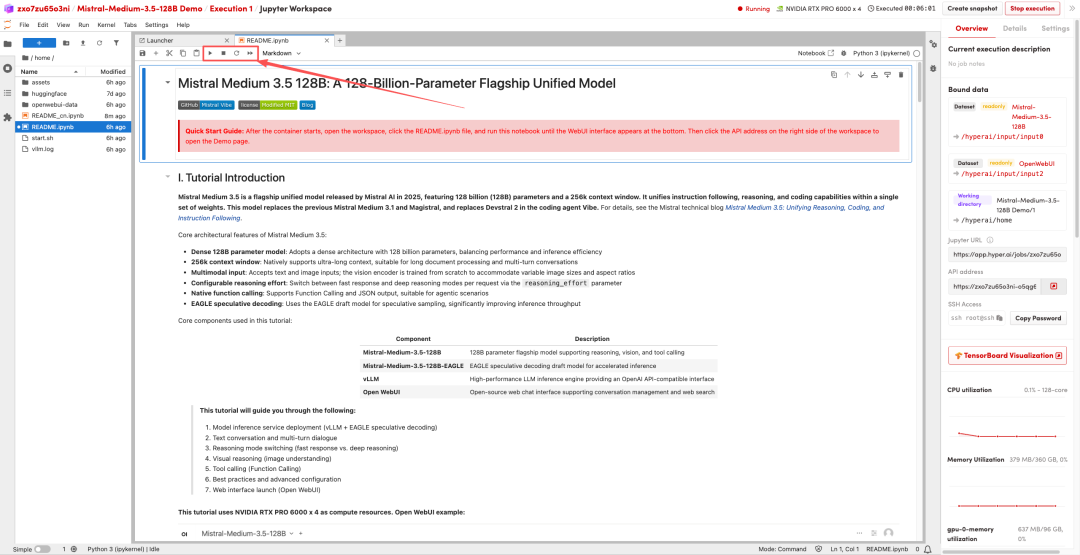
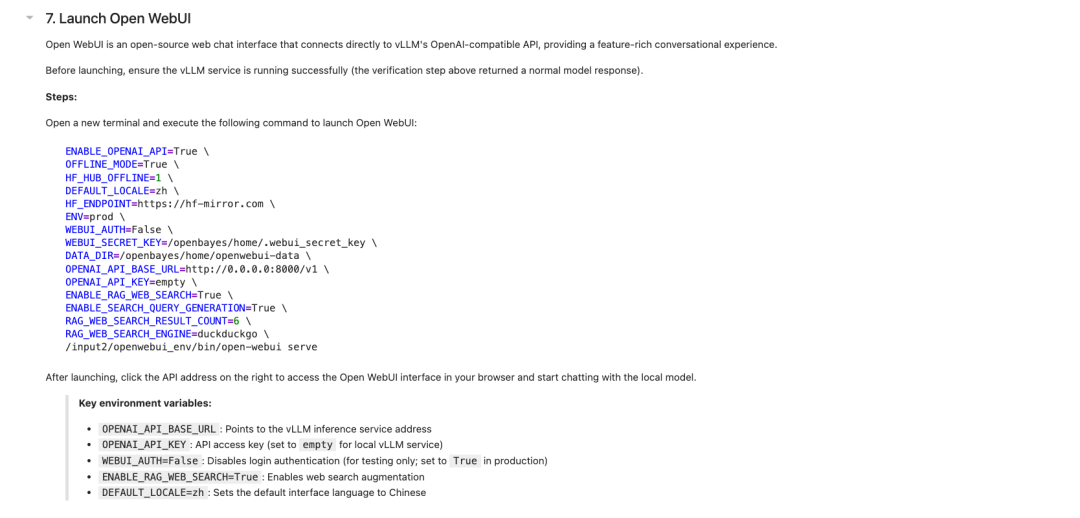
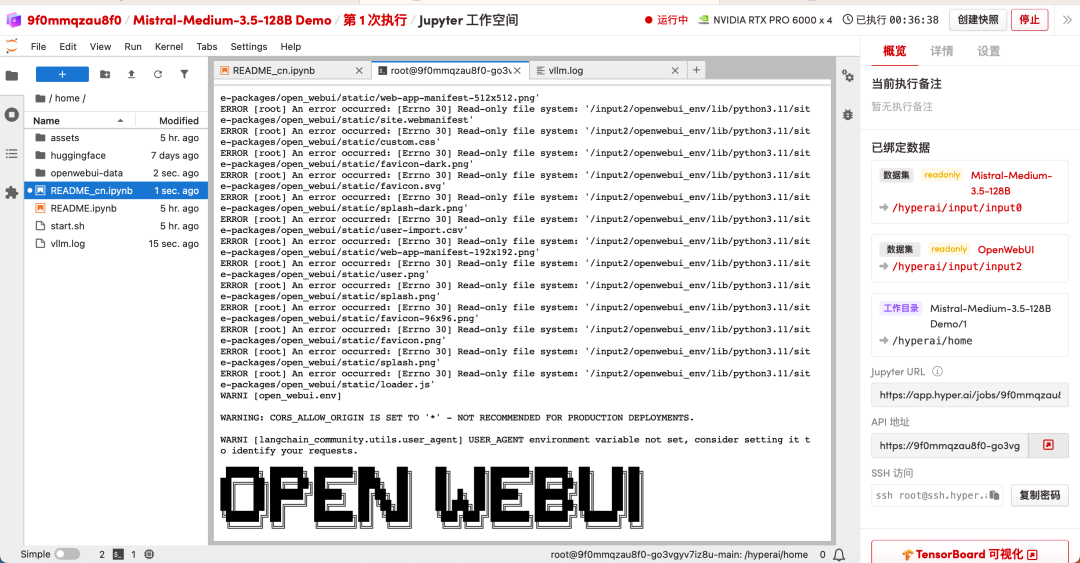
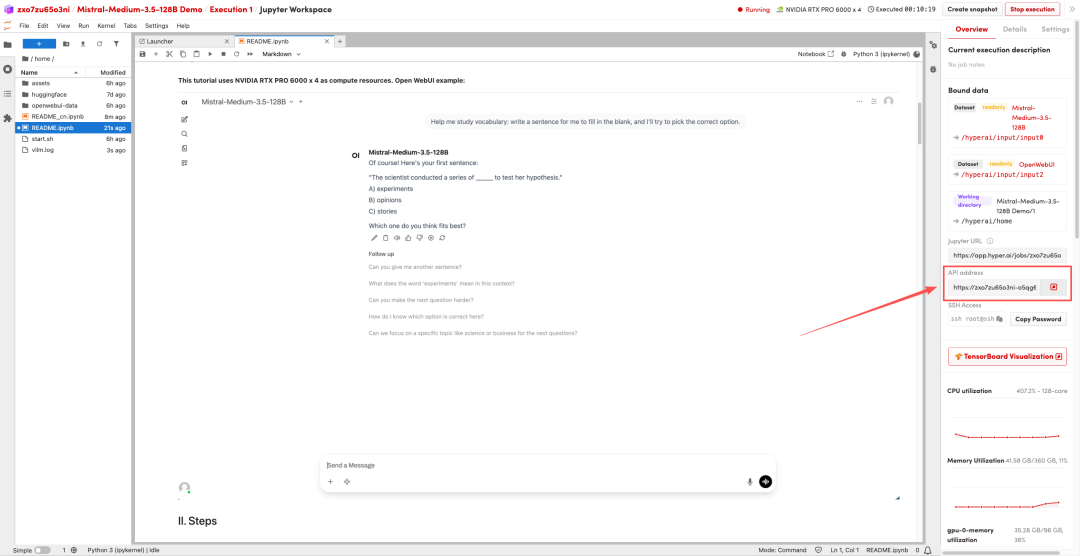
2. Once the process is complete, launch Open WebUI according to the README instructions. The startup is complete when you see the solid square-shaped "OPENWEBUI" ASCII characters. You can then click the API address on the right to go to the demo page.