Command Palette
Search for a command to run...
Online Tutorial | Turing Award Winner Yann LeCun Praised! Xiaohongshu open-sources InstantID, Allowing You to Customize Multiple Styles of Photos With Just One Original Photo

Not long ago, a group of post-95 engineers from Xiaohongshu and a team from Peking University jointly released the open source project "InstantID".Just upload a photo, and this AI photo tool can easily customize AI photos in various styles, saying goodbye to tedious photo editing.
Once InstantID was released, it attracted widespread attention, with 9.9K collections on GitHub. Turing Award winner Yann LeCun also reposted an example generated by the team in his image on his social account to express his support.

In the past, topic-driven text-to-image generation usually required training on multiple datasets containing the topic (such as people, styles). Representative solutions include DreamBooth and LoRAs. However, the high storage requirements and time-consuming fine-tuning process of such solutions discouraged many users, resulting in their inability to be quickly applied in real scenarios. The emergence of InstantID broke this deadlock.

The working principle of InstantID is mainly divided into three parts:
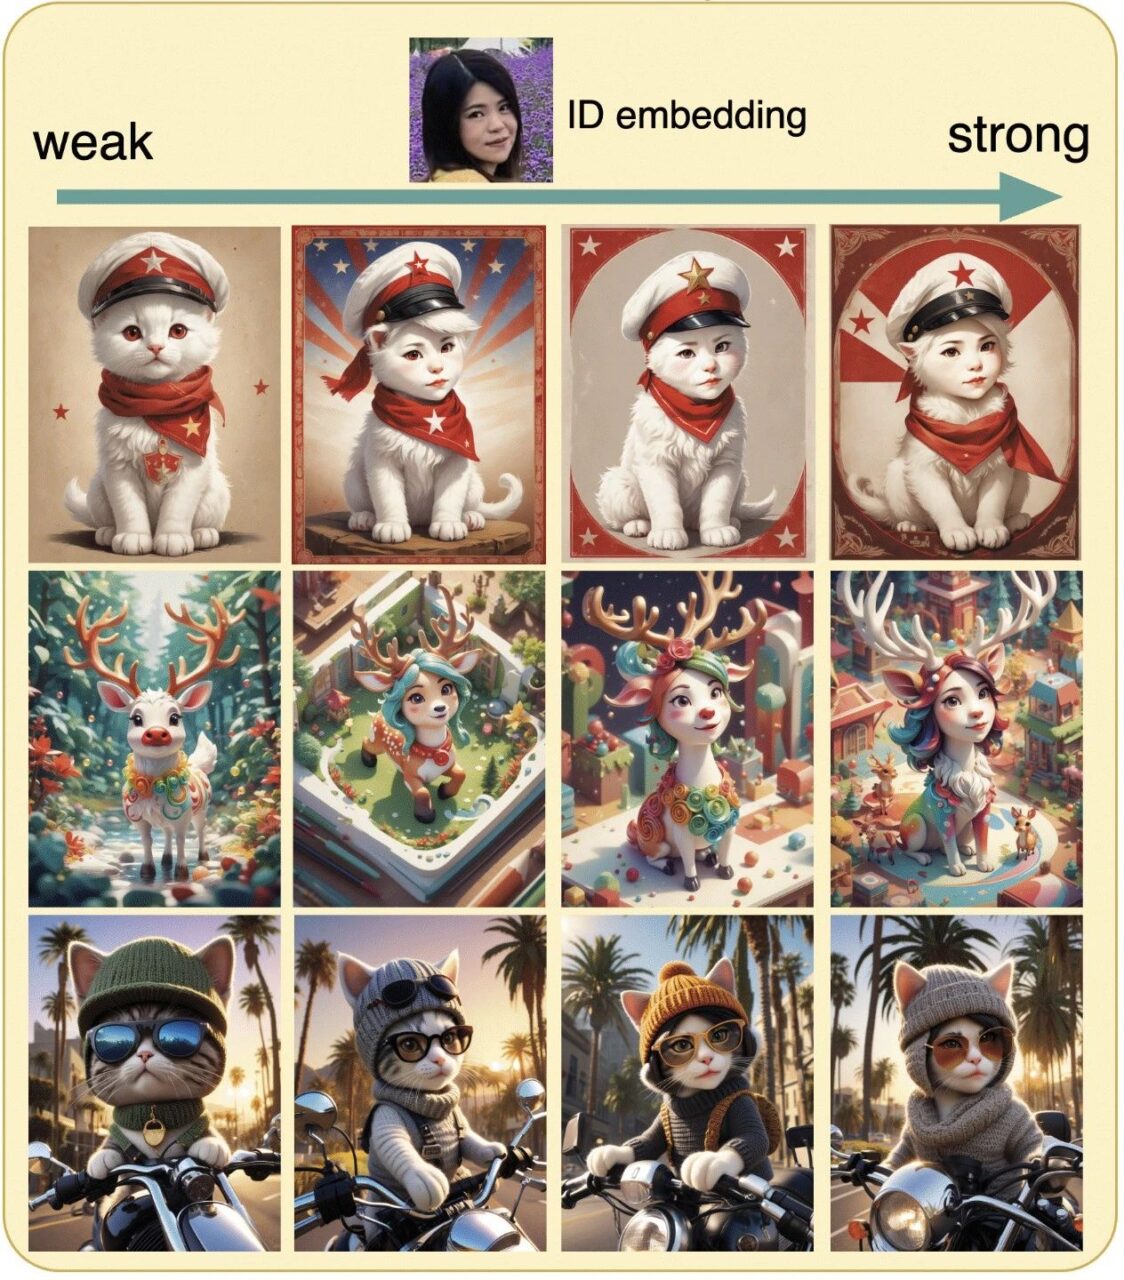
* ID Embedding: Through the pre-trained facial recognition model, semantic facial features are extracted into Face Embedding. This embedding is rich in semantic information, such as facial features, expressions, age, etc., providing a solid foundation for subsequent image generation.
* Image Adapter: A lightweight adaptation module is introduced to combine the extracted identity information with the textual hint. Through the decoupled cross-attention mechanism, the image and text can independently affect the generation of the image, and the image style can be finely controlled while maintaining the identity information.
* IdentityNet:It encodes the complex features of the reference facial image through strong semantic conditions (such as detailed description of facial features) and weak spatial conditions (such as the location of facial key points). The generation process is guided by Face Embedding, without the need for text information, and only needs to be updated for the newly added modules, keeping the pre-trained text-to-image model frozen to ensure flexibility.
Leave complexity to code and leave simplicity to users!InstantID not only achieves a breakthrough in zero-time personalized image synthesis in terms of technology, but also achieves the ultimate simplicity and intuitiveness in user experience. Whether you are a design novice or an art master, you can easily create personalized images on this platform. Specific application scenarios include:
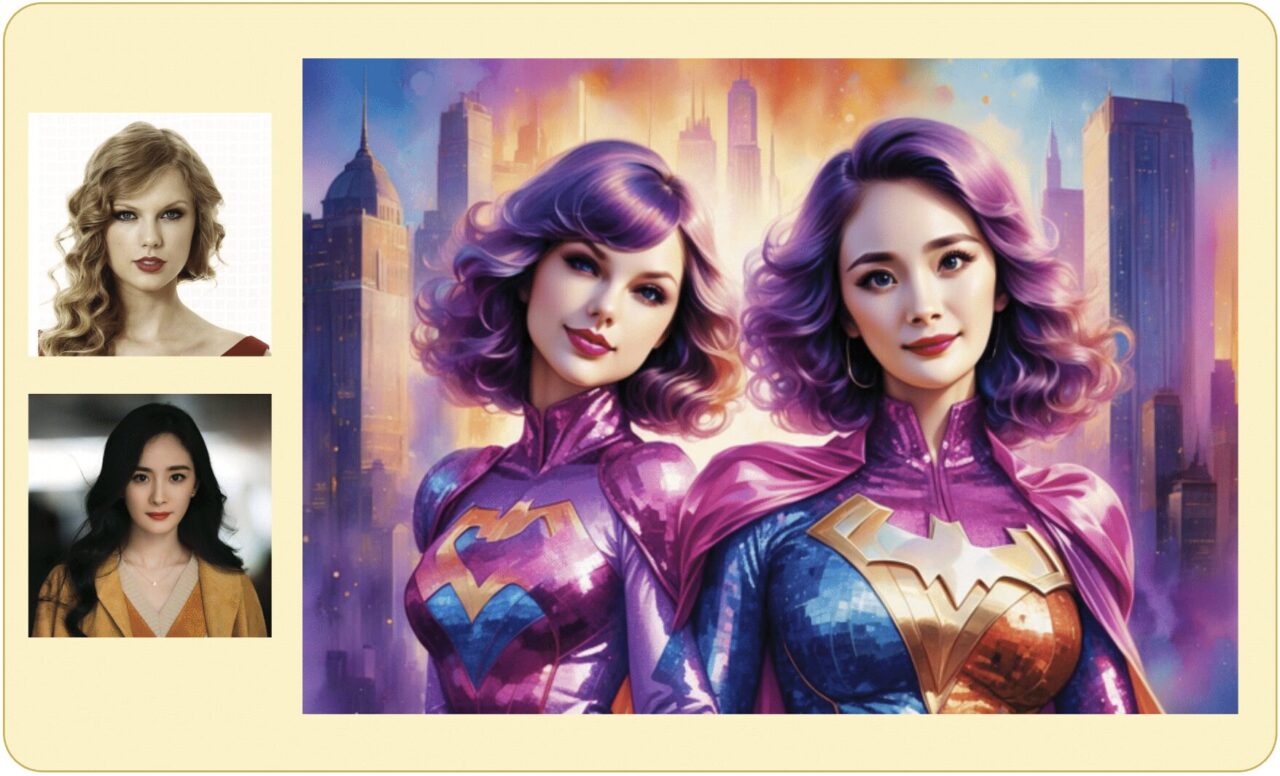
* Multi-ID and multi-style synthesis
InstantID enables "cross-border cooperation" with one click!
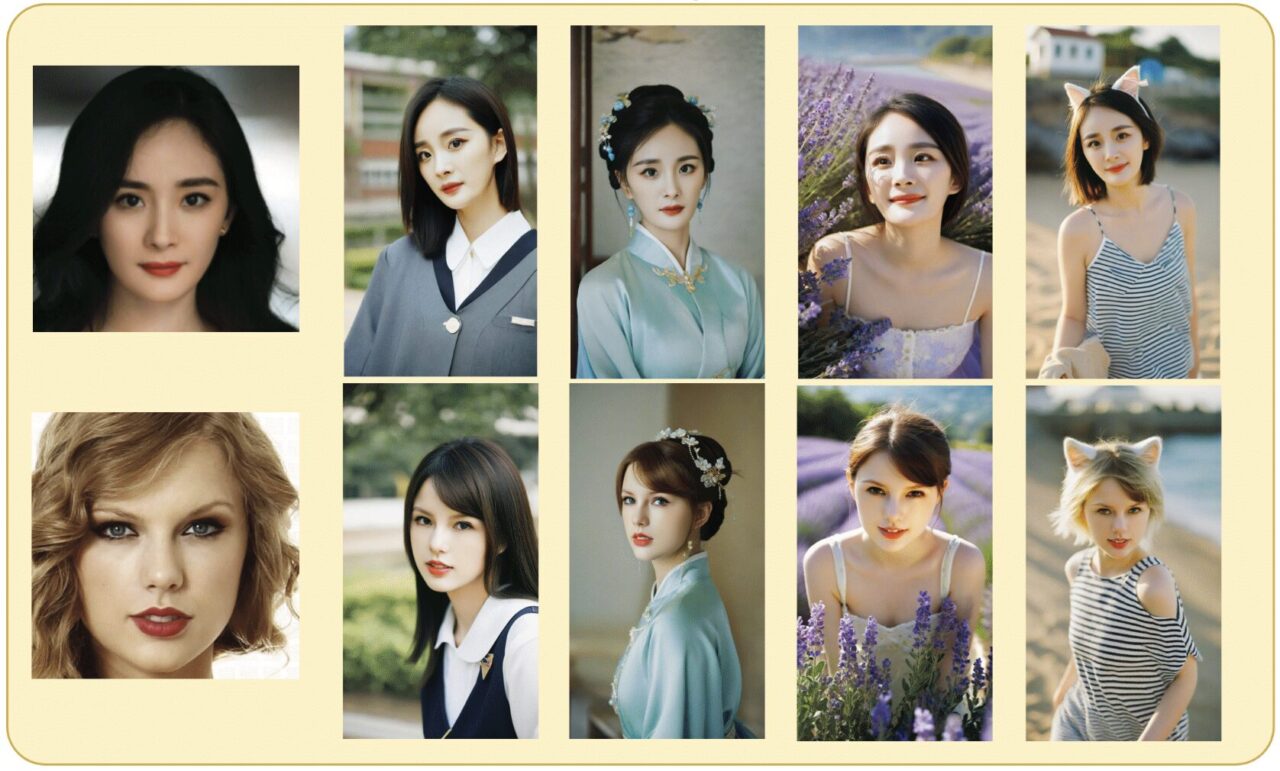
* Stylized synthesis
Just input a photo of a face to generate a variety of AI photos with personalized styles.

* Realistic synthesis
Are these images really composite?
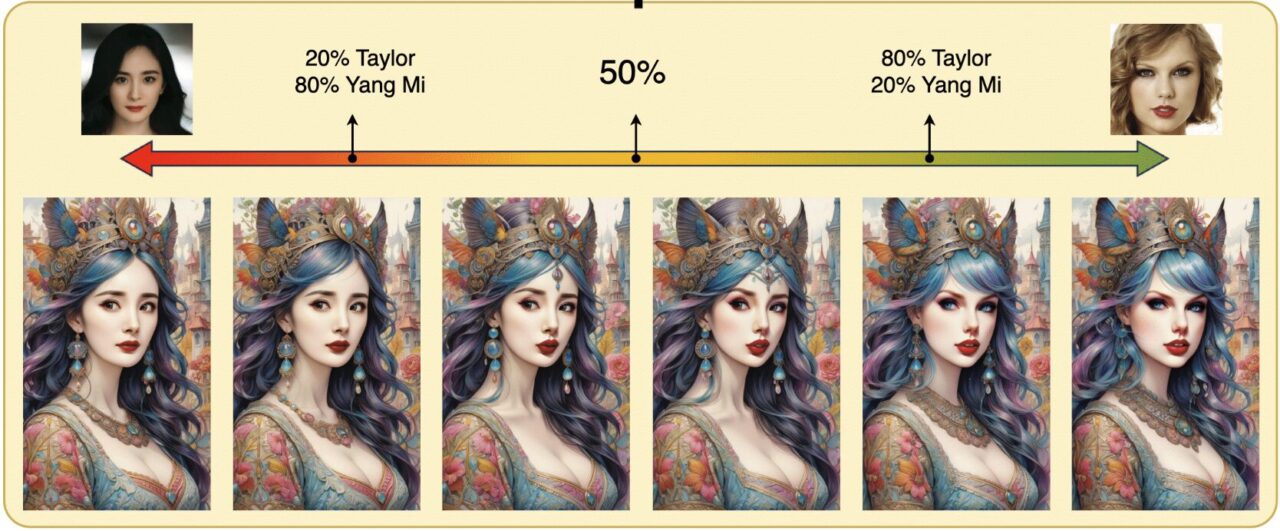
* ID interpolation
You can also merge the images of Yang Mi and Taylor. (ps: With this function, you can also predict the future appearance of your child based on the facial weights of both parents!)
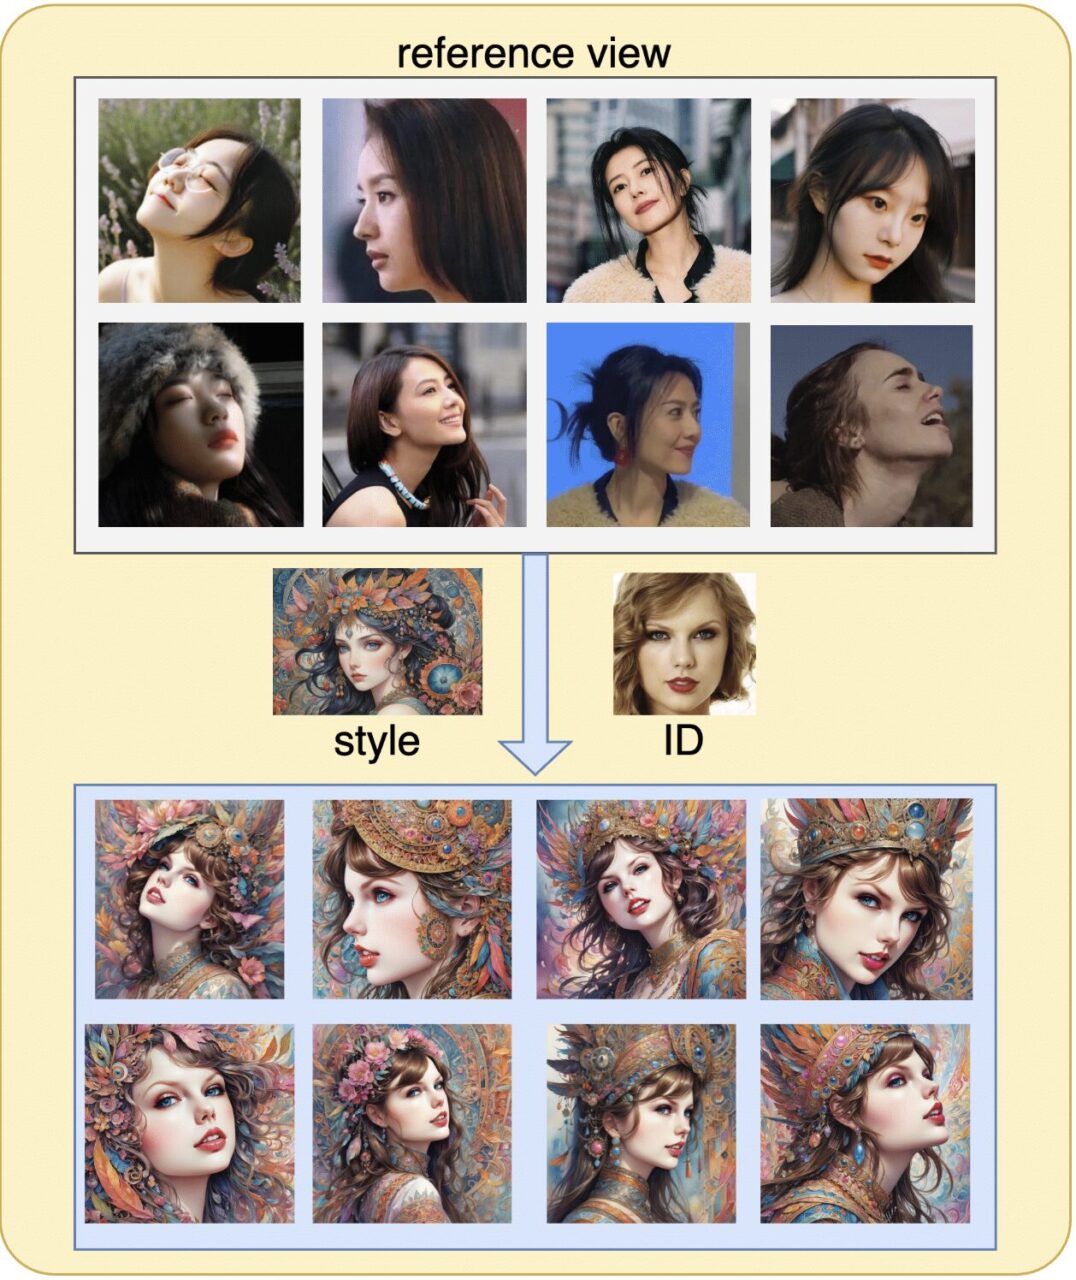
* New perspective synthesis
One original picture + one style reference picture = a versatile celebrity
* Non-portrait synthesis
What happens when people and animals merge?
There are so many styles for you to choose from. Can't wait to try them out? Don't worry.HyperAI has launched the "InstantID Personalized Photo Generation Demo" tutorial.This tutorial has built the environment for you. Just click Clone to start it with one click. Come and realize your "Seventy-two Transformations"!
Public tutorial address:
https://hyper.ai/tutorials/31559
Demo Run
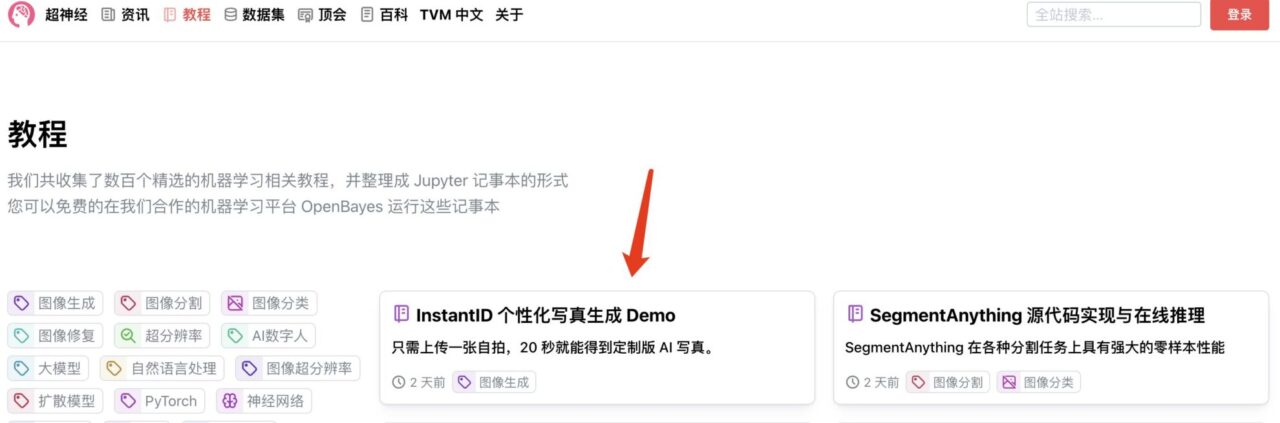
1. Log in to hyper.ai, and on the Tutorial page, select InstantID Personalized Photo Generation Demo. Click Run this tutorial online.
2. After the page jumps, click "Clone" in the upper right corner to clone the tutorial into your own container. Click "Next: Select Computing Power" in the lower right corner.


3. After the jump, select "NVIDIA GeForce RTX 4090" and click "Next: Review".New users can register using the invitation link below to get 4 hours of RTX 4090 + 5 hours CPU FreeHashrateDuration!
HyperAI exclusive invitation link (copy and open in browser):https://openbayes.com/console/signup?r=6bJ0ljLFsFh_Vvej

4. Click "Continue Execution" and wait for resources to be allocated. When the status changes to "Running", click "Open Workspace".


5. Create a new terminal session on the startup page and enter the following command.
cd InstantID

6. Enter the following command to run the Gradio demo.
python gradio_demo/app.py
7. When the command line displays "Running on local URL: https://0.0.0.0:8080", copy the API address on the right into the browser address bar to access the InstantID page.Please note that users must complete real-name authentication before using the API address access function.


Effect display
1. Open the InstantID page, upload the character image and the reference image. The reference image is used to fix the position of the character in the image.

2. Improve the following parameter adjustments.
*In the "Prompt" box, write the keywords for the image you want to generate. Usually the prompt is based on the initial image. If the uploaded image is of a man, you can write "a man".
*Click the "Eable Fast Inference with LCM" option. If it is not turned on, the speed of generating the graph will be slightly slower.

*「Style template」style selector can improve the prompt words, including effects such as 「Watercolor」 and 「Line Art」.
*「IdentityNet strength (for fidelity)」Face strength or ID strength, acts on the initially imported character image. The higher the parameter, the more similar the generated image is to the character image. The default value is 0.8.
*「Image adapter strength (for detail)」Image reference strength, acts on the reference image, the strength determines the similarity between the generated image and the reference image, the default value is 0.8.

*「Advanced Options」Advanced parameter adjustment.
*「Negative Prompt」, negative prompt words, you can fill in some content that you don’t want the final generated image to contain, such as avoiding low-quality words, etc.
*For "Number of sample steps", "Guidance scale", and "seed", just select the default values.
*「Randomize seed」Random seed, turn it on.
*「Enhance non-face region」 strengthens the non-face area. When turned on, it will increase the weight of the style selector.

3. Click "Submit" and the image will be generated in 5 seconds.


At present, the HyperAI official website has launched hundreds of selected machine learning related tutorials, which are organized into the form of Jupyter Notebook.
Click the link to search for related tutorials and datasets:https://hyper.ai/tutorials
The above is all the content of HyperAI Super Neural Network’s sharing this time. If you see a high-quality project, please leave a message in the background to recommend it to us! In addition, we have also established a "Stable Diffusion Tutorial Exchange Group", welcome friends to join the group to discuss various technical issues and share application results~
Scan the QR code to join the tutorial exchange group

If the QR code for joining the group is invalid, you can scan the QR code below to add the WeChat account of Neuro Star (WeChat ID: Hyperai01), note "SD Tutorial Exchange Group", and you can join the group chat.